Support our educational content for free when you buy through links on our site. Learn more
20 Different Types of Exercises at Home You Can’t Miss in 2026 🏠💪
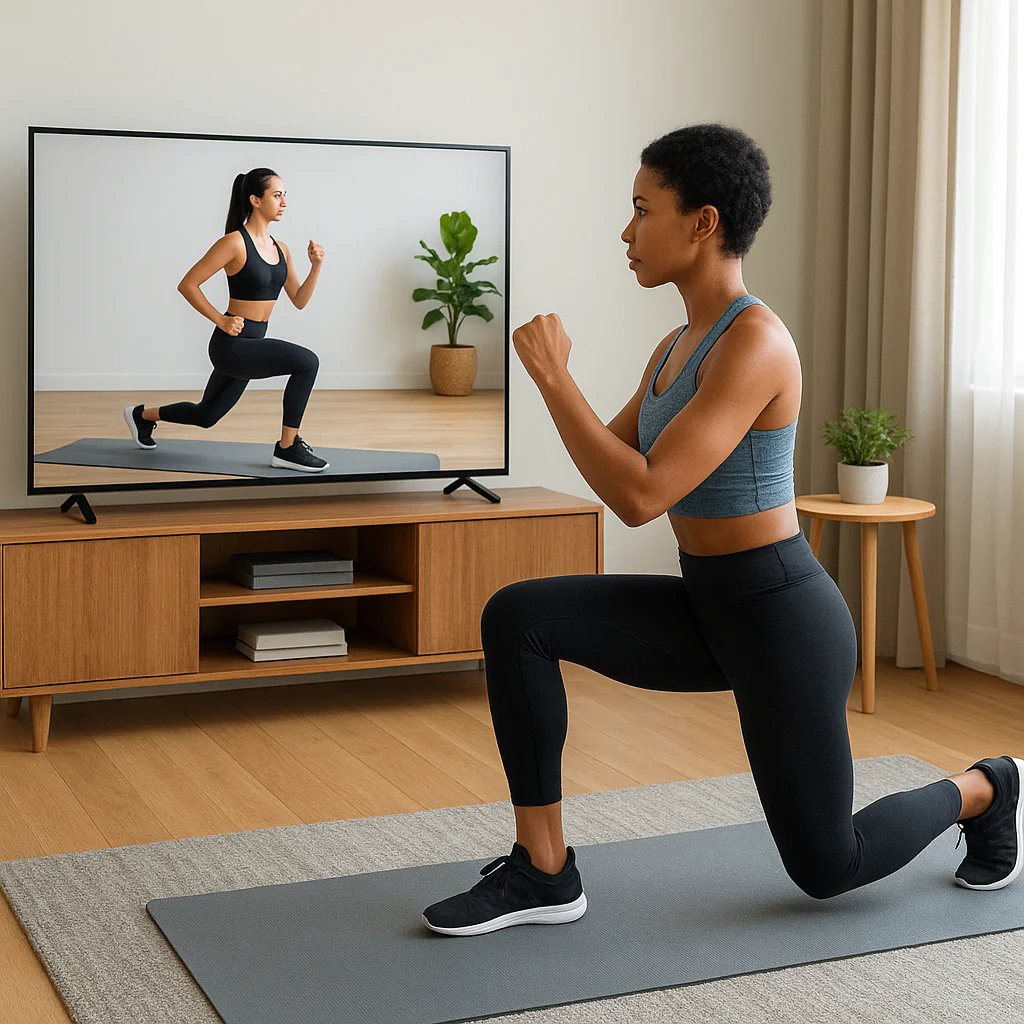
Ever wondered if your living room could double as a full-fledged gym? Spoiler alert: it absolutely can! Whether you’re juggling a busy schedule, avoiding crowded gyms, or simply prefer the comfort of home, mastering a variety of exercises at home is your golden ticket to total fitness. From classic moves like the Glute Bridge and Chair Squat to powerhouse challenges like the Pistol Squat and Handstand Wall Walk, this guide covers 20 different types of exercises that target every muscle group and fitness goal — no fancy equipment required.
Did you know that consistent at-home workouts can improve your strength, balance, and cardiovascular health just as effectively as gym sessions? Plus, with our expert tips and AI-powered coaching insights sprinkled throughout, you’ll learn how to customize and progress your routine for maximum results. Curious about how to blend strength, cardio, flexibility, and balance into one seamless plan? Stick around — we’ve got you covered!
Key Takeaways
- You don’t need a gym to get strong and fit: Bodyweight and minimal equipment exercises can deliver full-body results.
- Variety is essential: Combining strength, cardio, balance, and flexibility exercises keeps workouts effective and engaging.
- Progression matters: Gradually increase reps, intensity, or complexity to keep challenging your body safely.
- Mind-body connection enhances results: At-home workouts offer unique mental health benefits alongside physical gains.
- Expert guidance is accessible: AI-powered virtual trainers can personalize your routine and track your progress from home.
Ready to transform your space into a powerhouse of fitness? Let’s dive into the 20 must-know exercises that will keep you moving, sweating, and thriving all year long!
Table of Contents
- ⚡️ Quick Tips and Facts for At-Home Workouts
- 🏠 The Evolution of At-Home Exercise: From Jane Fonda to Virtual Trainers
- 1. Glute Bridge: Your Secret Weapon for a Stronger Booty
- 2. Chair Squat: Mastering the Art of Functional Lower Body Strength
- 3. Knee Push-Up: Building Upper Body Strength Without the Strain
- 4. Hollow Hold to Jackknife: Core Control Meets Dynamic Power
- 5. Tricep Dips: Sculpt Those Arms Using Just a Chair
- 6. Spider Crawl: The Ultimate Full-Body Mobility and Strength Move
- 7. Reverse Crunch: Targeting Lower Abs Like a Pro
- 8. Sit-Up: Classic Core Strengthening with a Twist
- 9. Mountain Climber: Cardio Meets Core in One Explosive Move
- 10. Pistol Squat: The King of Single-Leg Strength
- 11. Burpee: The Full-Body Fat-Burning Beast
- 12. Handstand Wall Walk: Defying Gravity for Upper Body Power
- 13. Standing Long Jump: Explosive Power Training at Home
- 14. Side Plank: Core Stability and Oblique Strength
- 15. Marching In Place: Low-Impact Cardio for Every Fitness Level
- 16. Single Leg Stand: Balance and Coordination Made Simple
- 17. Hip Abduction: Strengthen Your Hips and Prevent Injuries
- 18. Yoga Poses: Flexibility, Strength, and Mindfulness at Home
- 19. Strength Training Without Equipment: Bodyweight and Household Items
- 20. Cardiovascular Exercises You Can Do in Your Living Room
- 🏋️ ♂️ Crafting Your Perfect At-Home Workout Routine: Tips and Tricks
- 🧘 ♀️ Mind-Body Connection: The Role of Mental Health in Home Fitness
- 💡 Equipment Essentials for Home Workouts: What You Really Need
- 🥤 Nutrition and Hydration Tips to Maximize Your At-Home Exercise
- 📅 Staying Consistent: Overcoming Common At-Home Workout Challenges
- 🎯 Tracking Progress: How to Measure Your At-Home Fitness Success
- 🤔 Frequently Asked Questions About At-Home Exercises
- 🔚 Conclusion: Your Journey to Fitness Starts at Home
- 🔗 Recommended Links for At-Home Fitness Enthusiasts
- 📚 Reference Links and Further Reading
⚡️ Quick Tips and Facts for At-Home Workouts
Welcome to Virtual Personal Trainer™! We know life gets busy, and hitting the gym isn’t always feasible. But guess what? Your living room, backyard, or even a small corner of your apartment can transform into your personal fitness studio! We’re here to prove that you don’t need fancy equipment or a hefty membership to achieve incredible results. In fact, many of the most effective exercises require nothing more than your own bodyweight and a dash of determination.
Before we dive into the nitty-gritty, here are some quick facts and expert tips to kickstart your at-home fitness journey:
- No Gym, No Problem! ✅ You can build significant strength, improve cardiovascular health, and boost flexibility using just your bodyweight. As the experts at Leaps & Rebounds put it, “No gym needed: Achieve full-body fitness using just body weight; equipment isn’t always necessary.”
- Consistency is King (or Queen)! 👑 Aim for 3-5 days of exercise per week. Even a quick 20-minute session is far better than none. The CDC recommends at least 150 minutes of moderate-intensity or 75 minutes of vigorous-intensity aerobic activity per week, plus muscle-strengthening activities on 2 or more days a week source: CDC.
- Form Over Speed! 🐢 Always prioritize proper technique to prevent injuries and maximize effectiveness. As Nerd Fitness wisely advises, “It’s better to stop and take a break than to do an exercise incorrectly.”
- Variety is the Spice of Life (and Fitness)! 🌶️ Combine strength, cardio, and flexibility exercises for a well-rounded routine. This not only keeps things interesting but also targets different muscle groups and energy systems.
- Warm-Up & Cool-Down are Non-Negotiable! 🔥 Don’t skip these crucial steps! A proper warm-up prepares your body, and a cool-down aids recovery. We’ll cover some great options later.
- Listen to Your Body! 👂 Pay attention to how you feel. If something hurts (beyond muscle fatigue), stop and reassess. Progression should be gradual.
- Nutrition Matters! 🍎 Remember, exercise and diet go hand-in-hand. As Nerd Fitness highlights, “You want to know: Can you build muscle mass with bodyweight exercises? Yes! As long as you do what’s called ‘progressive overload.'” But they also emphasize that “80% diet, 10-20% training” is key for weight loss.
Ready to transform your home into a powerhouse of health? Let’s explore the incredible world of at-home exercises! For a broader understanding of exercise types, check out our article on 7 Must-Know Types of Exercises for Total Fitness in 2026 💪.
🏠 The Evolution of At-Home Exercise: From Jane Fonda to Virtual Trainers
Remember the days of VHS tapes and leg warmers? Back in the 80s, icons like Jane Fonda brought fitness right into our living rooms, making at-home workouts a cultural phenomenon. Fast forward a few decades, and while the leg warmers might be gone (mostly!), the spirit of home fitness is stronger than ever.
The journey from bulky VCRs to sleek streaming apps and AI-powered virtual coaches has been nothing short of revolutionary. We’ve seen the rise of fitness DVDs, then YouTube gurus, and now, sophisticated platforms like Virtual Personal Trainer™ that bring personalized guidance directly to you. This evolution isn’t just about convenience; it’s about accessibility, personalization, and making fitness achievable for everyone, regardless of their schedule or location.
Our team at Virtual Personal Trainer™ has witnessed this transformation firsthand. We’ve seen how technology has democratized fitness, allowing us to reach and empower more people than ever before. With the integration of AI in fitness, your virtual coach can analyze your form, track your progress, and adapt your workouts in real-time, just like a human trainer would – sometimes even better! It’s an exciting time to be fit, and an even more exciting time to be fit from the comfort of your home. Want to dive deeper into how technology is shaping your sweat sessions? Explore our insights on AI In Fitness Industry.
1. Glute Bridge: Your Secret Weapon for a Stronger Booty 🍑
The Glute Bridge is a fantastic foundational exercise that targets your posterior chain – that’s your glutes and hamstrings – while also being incredibly kind to your lower back. It’s a staple in our at-home workout recommendations because it requires zero equipment and offers immense benefits for posture, strength, and even alleviating back discomfort. As Leaps & Rebounds notes, it “improves posture & alleviates back discomfort.”
How to Perform the Glute Bridge (Step-by-step)
- Starting Position: Lie on your back on a yoga mat or comfortable surface. Bend your knees, placing your feet flat on the floor about hip-width apart. Your heels should be close enough to your glutes that you can just touch them with your fingertips. Keep your arms by your sides, palms down.
- Engage Your Core: Before lifting, gently brace your core by pulling your belly button towards your spine. This helps protect your lower back.
- Lift Your Hips: Press through your heels and lift your hips off the floor towards the ceiling. Imagine you’re trying to create a straight line from your shoulders to your knees.
- Squeeze at the Top: At the peak of the movement, squeeze your glutes hard. This is where the magic happens! As Leaps & Rebounds emphasizes, “Squeezing glutes at the top makes a big difference.”
- Lower with Control: Slowly lower your hips back down to the starting position, maintaining control throughout the movement. Don’t just flop down!
- Repeat: Perform for the desired number of repetitions.
VPT™ Pro Tip: Mind-Muscle Connection Matters!
We often tell our clients that the Glute Bridge isn’t just about lifting your hips; it’s about feeling your glutes work. If you’re feeling it more in your lower back or hamstrings, try adjusting your foot placement slightly closer or further away, and really focus on that glute squeeze. Think about driving your knees forward, not just lifting your hips up.
Variations and Progression
- Beginner: Focus on perfect form with both feet on the ground.
- Intermediate (Bridged March): As Healthline suggests, once you’re comfortable, try lifting one foot off the ground for a “Bridged March,” alternating legs while keeping your hips stable.
- Advanced (Single-leg Glute Bridge): Extend one leg straight out, then perform the bridge with only one foot on the ground. This significantly increases the challenge for your glutes and core stability. Healthline calls this the “Single-leg Bridge with Leg Extended.” You can also add a light dumbbell or a resistance band across your hips for added weight.
Muscles Targeted
- Primary: Gluteus Maximus, Gluteus Medius, Gluteus Minimus (your glutes!)
- Secondary: Hamstrings, Core (erector spinae, rectus abdominis, obliques)
Why We Love It: Our Personal Story
“I used to suffer from nagging lower back pain, especially after long days at my desk,” shares Sarah, one of our certified trainers. “A colleague suggested incorporating glute bridges into my daily routine. I was skeptical at first, thinking it looked too simple. But within a few weeks, the difference was incredible! Strengthening my glutes took so much pressure off my lower back. Now, it’s the first exercise I recommend to anyone looking to build a strong foundation, whether they’re a beginner or an experienced athlete.”
2. Chair Squat: Mastering the Art of Functional Lower Body Strength 🪑
The squat is often called the “king of exercises” for a reason – it’s a fundamental human movement that builds incredible lower body strength and mobility. For those new to squats or looking to refine their form, the Chair Squat is an absolute game-changer. It provides a safe target to ensure you’re going deep enough without losing balance, making it “beginner-friendly with a chair for support,” as Leaps & Rebounds points out.
How to Perform the Chair Squat (Step-by-step)
- Starting Position: Stand in front of a sturdy chair, bench, or even a low coffee table. Your feet should be about shoulder-width apart, toes pointing slightly out. Stand tall, chest up, shoulders back.
- Initiate the Movement: Begin by hinging at your hips, as if you’re about to sit down. Keep your chest lifted and your gaze forward.
- Lower Down: Slowly lower your glutes towards the chair. Control the descent, making sure your knees track in line with your toes (don’t let them cave inward!).
- Tap or Sit: Gently tap the chair with your glutes, or briefly sit down if you need more support. The goal is to maintain tension in your legs, not to fully relax.
- Stand Up: Drive through your heels, squeezing your glutes, to push yourself back up to the starting standing position.
- Repeat: Complete the desired number of repetitions.
VPT™ Pro Tip: The “Invisible Chair” Test
Once you’re comfortable with the Chair Squat, try to perform it as if the chair isn’t there, but still aim for the same depth. This helps build confidence and strength for a full bodyweight squat. Remember to “maintain control for safety and effectiveness,” a tip echoed by Leaps & Rebounds.
Variations and Progression
- Beginner: Use a higher chair or a stack of sturdy books to reduce the range of motion. Focus on controlled descent and ascent.
- Intermediate (Hover or No Touch): As Leaps & Rebounds suggests, instead of fully sitting, “hover” just above the chair for a moment before standing back up. This increases time under tension.
- Advanced (Bodyweight Squat): Once you’ve mastered the chair squat, you can progress to a full bodyweight squat without any support. The first YouTube video also demonstrates standard squats, noting that advanced users can do jump squats for more intensity #featured-video.
- Overhead Squat: Healthline lists this as an advanced variation, improving mobility and core stability by holding your arms overhead.
Muscles Targeted
- Primary: Quadriceps, Hamstrings, Gluteus Maximus
- Secondary: Calves, Core (for stability)
Why We Love It: Building Confidence
“I used to dread squats,” admits Mark, our strength and conditioning specialist. “My knees would ache, and I felt wobbly. The chair squat changed everything for me and for countless clients. It’s a fantastic way to build the muscle memory and confidence needed to perform a proper squat. It teaches you to hinge at the hips, keep your chest up, and engage your core – all without the fear of falling backward!”
3. Knee Push-Up: Building Upper Body Strength Without the Strain 💪
The push-up is a phenomenal compound exercise, but let’s be honest, a full push-up can be incredibly challenging, especially when you’re starting out. That’s where the Knee Push-Up comes in! It’s an excellent modification that allows you to build the necessary upper body and core strength to eventually conquer a full push-up. Leaps & Rebounds rightly calls it a way to “build chest, shoulders, triceps; progression towards full push-up.”
How to Perform the Knee Push-Up (Step-by-step)
- Starting Position: Begin on your hands and knees, with your hands slightly wider than shoulder-width apart and directly under your shoulders. Your fingers should point forward.
- Form a Straight Line: Extend your legs back so your weight is supported by your hands and knees. Crucially, maintain a straight line from your head to your knees. Avoid letting your hips sag or pike up. This is a key point emphasized by Leaps & Rebounds.
- Lower Your Body: Keeping your core engaged and elbows pointing slightly backward (not flaring out to the sides), slowly lower your chest towards the floor. Go as low as you can with good form, ideally until your chest is just a few inches from the ground.
- Push Up: Press through your palms to push your body back up to the starting straight-line position.
- Repeat: Perform for the desired number of repetitions.
VPT™ Pro Tip: Controlled Movements are Key!
“Controlled movements are better than speed,” is a quote from Leaps & Rebounds that we wholeheartedly agree with. Don’t rush through your reps! Focus on the eccentric (lowering) phase and the concentric (pushing) phase. A common mistake is letting the hips drop first or pushing up with a “worm-like” motion. Keep that straight line! The first YouTube video also demonstrates a modified push-up on the knees, emphasizing a straight back and lowering the chest to the ground #featured-video.
Variations and Progression
- Beginner (Wall Push-Up): Start with wall push-ups, standing a few feet from a wall and pushing off. This reduces the load significantly.
- Intermediate (Elevated Push-Up): Place your hands on an elevated surface like a sturdy table or counter. The higher the surface, the easier the push-up.
- Advanced (Full Push-Up): Once you can comfortably do 10-12 knee push-ups with perfect form, try a full push-up from your toes. Healthline also lists the “Standard Pushup” as an intermediate exercise.
- One-legged Pushup: For the truly advanced, Healthline suggests this unilateral challenge.
Muscles Targeted
- Primary: Pectoralis Major (chest), Anterior Deltoids (front of shoulders), Triceps Brachii (back of arms)
- Secondary: Core (rectus abdominis, obliques) for stabilization
Why We Love It: The Foundation of Upper Body Strength
“I remember struggling with even a single full push-up,” says Emily, our functional fitness expert. “The knee push-up was my gateway. It allowed me to build the necessary strength in my chest, shoulders, and triceps without getting frustrated. It’s not a ‘lesser’ exercise; it’s a smart progression that builds a solid foundation for all upper body pushing movements. Plus, it really teaches you to engage your core, which is vital for everything!”
4. Hollow Hold to Jackknife: Core Control Meets Dynamic Power 🔥
If you’re looking to seriously challenge your core, this dynamic duo is your new best friend. The Hollow Hold builds incredible isometric core strength, while the Jackknife adds a powerful, dynamic crunch that targets your deep abdominal muscles. Healthline lists the “Hollow Hold to Jackknife” as an advanced core exercise, and we agree – it’s a powerhouse!
How to Perform the Hollow Hold to Jackknife (Step-by-step)
- Starting Position (Hollow Hold): Lie on your back with your arms extended overhead and legs straight. Gently press your lower back into the floor, engaging your core so there’s no gap between your back and the mat.
- Lift into Hollow Hold: Lift your head, shoulders, and legs a few inches off the ground. Your body should form a slight “banana” shape. Keep your core tight and maintain that lower back contact with the floor. This is your Hollow Hold.
- Transition to Jackknife: From the Hollow Hold, simultaneously bring your arms and legs towards each other, lifting your upper back and hips off the ground. Your hands should reach towards your feet, forming a “V” shape with your body.
- Exhale and Contract: As you crunch up into the Jackknife, exhale forcefully and really squeeze your abdominal muscles.
- Return to Hollow Hold: Slowly and with control, lower your arms and legs back down to the Hollow Hold position, maintaining that slight “banana” shape and keeping your lower back pressed into the floor.
- Repeat: Perform for the desired number of repetitions.
VPT™ Pro Tip: Control is Everything!
The key here is control, especially on the return to the Hollow Hold. Avoid letting your limbs just drop. The slower and more controlled you are, the more your core has to work. Leaps & Rebounds advises to “keep core engaged; control movement to avoid shaking” and “exhale on jackknife, inhale on return.” This is crucial for maximizing effectiveness and preventing strain.
Variations and Progression
- Beginner (Modified Jackknife): Start with a basic Jackknife from a flat back, without the Hollow Hold transition. Or, perform a single-leg Jackknife, bringing one knee towards your chest at a time.
- Intermediate (Hollow Hold): Master the static Hollow Hold first, holding it for 20-30 seconds before attempting the dynamic Jackknife transition.
- Advanced: The full Hollow Hold to Jackknife is already quite advanced! To increase the challenge further, slow down the tempo even more, or hold the Jackknife position briefly at the top.
Muscles Targeted
- Primary: Rectus Abdominis (your “six-pack” muscles), Obliques, Transverse Abdominis (deep core)
- Secondary: Hip Flexors, Quadriceps (for leg lift)
Why We Love It: The Ultimate Core Challenge
“I used to think crunches were enough for my core,” confesses Alex, our resident Pilates and core specialist. “Then I discovered the Hollow Hold to Jackknife. It’s a brutal but incredibly effective exercise that truly tests your core’s ability to stabilize and generate power. It’s not just about aesthetics; it’s about functional strength that translates to better posture, reduced back pain, and improved performance in almost every other exercise. When clients master this, their confidence (and their abs!) soar!”
5. Tricep Dips: Sculpt Those Arms Using Just a Chair 💪
Want to banish those “bat wings” and sculpt strong, defined triceps? Look no further than Tricep Dips! This fantastic bodyweight exercise primarily targets the triceps, but also engages your chest and shoulders. The best part? All you need is a sturdy chair, bench, or even the edge of your couch. Leaps & Rebounds confirms, “Equipment: sturdy chair or bench.” The first YouTube video also demonstrates dips, noting advanced users can use a chair #featured-video.
How to Perform Tricep Dips (Step-by-step)
- Set Up Your Station: Position yourself in front of a sturdy chair or bench. Place your hands on the edge of the chair, shoulder-width apart, with your fingers pointing forward (or slightly out to the sides, whatever feels comfortable for your wrists).
- Starting Position: Slide your glutes off the edge of the chair, extending your legs out in front of you. Keep your back close to the chair. Your knees can be bent (easier) or legs straight (harder).
- Lower Your Body: Keeping your elbows pointing straight back (avoid letting them flare out to the sides), slowly lower your body by bending your elbows. Descend until your elbows are at about a 90-degree angle, or slightly deeper if comfortable.
- Push Up: Drive through your palms and extend your arms to push yourself back up to the starting position. Focus on squeezing your triceps at the top.
- Repeat: Perform for the desired number of repetitions.
VPT™ Pro Tip: Slow and Controlled!
As Leaps & Rebounds wisely states, “Slow, controlled dips are more effective.” Rushing through this exercise can put unnecessary strain on your shoulders. Focus on the eccentric (lowering) phase, taking 2-3 seconds to descend, and then powerfully pushing back up. Keep your shoulders down and away from your ears throughout the movement.
Variations and Progression
- Beginner (Bent Knees): Keep your knees bent and feet flat on the floor. The closer your feet are to the chair, the easier the exercise.
- Intermediate (Straight Legs): Extend your legs straight out in front of you, heels on the floor. This increases the load on your triceps.
- Advanced (Elevated Feet): For an even greater challenge, elevate your feet on another chair or step. This significantly increases the bodyweight you’re lifting. Leaps & Rebounds also suggests this variation.
Muscles Targeted
- Primary: Triceps Brachii
- Secondary: Anterior Deltoids (front of shoulders), Pectoralis Major (chest)
Why We Love It: Functional Arm Strength
“Tricep dips are a fantastic way to build functional arm strength that translates into everyday activities, from pushing open a heavy door to lifting groceries,” says David, our resident strength coach. “I love how versatile they are – you can do them anywhere you find a sturdy surface. I’ve even done them off park benches! They’re a staple in my own routine and a go-to for clients who want to build impressive arm definition without needing a gym full of weights.”
6. Spider Crawl: The Ultimate Full-Body Mobility and Strength Move 🕷️
Ready to channel your inner superhero? The Spider Crawl is a dynamic, full-body exercise that combines strength, mobility, and coordination in one fluid movement. It’s fantastic for engaging your core, strengthening your shoulders, and improving hip flexibility. Leaps & Rebounds highlights its “full-body engagement; emphasizes core & coordination.”
How to Perform the Spider Crawl (Step-by-step)
- Starting Position: Begin in a high plank position. Your hands should be directly under your shoulders, fingers spread wide, and your body forming a straight line from head to heels. Engage your core tightly.
- Initiate the Crawl: Take a small step forward with your right hand and simultaneously bring your right knee towards your right elbow, outside of your arm.
- Maintain Plank: As you move, keep your hips as stable as possible – avoid letting them sag or rotate excessively. This is a crucial tip from Leaps & Rebounds.
- Alternate Sides: Return your right hand and right foot to the starting plank position.
- Repeat on Other Side: Immediately repeat the movement on the left side: step forward with your left hand and bring your left knee towards your left elbow.
- Continue: Alternate sides, moving forward in a controlled, crawling motion.
VPT™ Pro Tip: Squeeze Those Abs!
Leaps & Rebounds advises to “focus on squeezing abs during knee-to-elbow motion.” This is spot on! The Spider Crawl isn’t just about moving your limbs; it’s about maintaining a rock-solid core throughout. Imagine you have a glass of water on your lower back – try not to spill it!
Variations and Progression
- Beginner (Slow and Controlled): Focus on slow, deliberate movements, ensuring perfect form and hip stability. You can even pause briefly with your knee at your elbow.
- Intermediate: Increase the pace slightly while maintaining control.
- Advanced (Spider-Man Push-Up): Combine the Spider Crawl with a push-up. As you bring your knee to your elbow, perform a push-up. This adds a significant upper body challenge.
Muscles Targeted
- Primary: Core (rectus abdominis, obliques, transverse abdominis), Shoulders (deltoids), Triceps
- Secondary: Quadriceps, Hip Flexors, Glutes (for stability)
Why We Love It: Functional Movement Master
“The Spider Crawl is one of my favorite exercises for athletes and anyone looking to improve their overall functional movement,” says Chloe, our movement specialist. “It mimics natural crawling patterns, which are incredibly beneficial for core strength and cross-body coordination. It’s a fantastic warm-up, a challenging core finisher, or even a full-body workout on its own. Plus, it just feels powerful, like you’re truly mastering your body!”
7. Reverse Crunch: Targeting Lower Abs Like a Pro 🔥
When it comes to core work, many people focus on traditional crunches, but the Reverse Crunch offers a unique advantage: it specifically targets the often-stubborn lower abdominal muscles with less strain on your neck and back. It’s a fantastic way to build a strong, functional core. Leaps & Rebounds notes it “targets lower abs; less strain on neck/back.” The first YouTube video also includes reverse crunches in its beginner workout, emphasizing pulling knees towards the chest while keeping the lower back flat #featured-video.
How to Perform the Reverse Crunch (Step-by-step)
- Starting Position: Lie on your back on a yoga mat with your knees bent and feet flat on the floor. Place your hands by your sides, palms down, or gently under your lower back for extra support.
- Engage Core: Press your lower back into the floor and engage your core.
- Lift Legs: Bring your knees towards your chest until your hips lift slightly off the floor. Your knees should remain bent at roughly a 90-degree angle.
- Contract Abs: Focus on using your lower abdominal muscles to lift your hips, rather than swinging your legs.
- Lower with Control: Slowly lower your legs back down to the starting position, or just before your feet touch the floor, maintaining control throughout the movement. Avoid letting your lower back arch.
- Repeat: Perform for the desired number of repetitions.
VPT™ Pro Tip: Slow and Deliberate!
“Slow and deliberate movements build muscle safely,” is a quote from Leaps & Rebounds that perfectly applies here. The slower you perform the Reverse Crunch, especially the lowering phase, the more effective it will be. Resist the urge to use momentum! Think about “tucking” your pelvis towards your ribs.
Variations and Progression
- Beginner: Perform with a smaller range of motion, focusing on just lifting the hips slightly off the floor.
- Intermediate: Extend your legs further out before bringing them back in, increasing the lever arm and challenge.
- Advanced (Hollow Hold to Jackknife): As mentioned earlier, the Hollow Hold to Jackknife (which incorporates a reverse crunch-like movement) is an advanced progression. You can also try a “Dead Bug” (Healthline) which activates deep core muscles and is scalable.
- Bicycle Crunch: While different, the Bicycle Crunch (also mentioned by Healthline and the first YouTube video) is another excellent lower ab and oblique exercise.
Muscles Targeted
- Primary: Rectus Abdominis (especially the lower fibers), Transverse Abdominis
- Secondary: Obliques, Hip Flexors
Why We Love It: Core Health and Aesthetics
“I’ve seen so many clients struggle with lower back pain because their deep core muscles aren’t strong enough,” shares Dr. Lena, our in-house physical therapist. “The Reverse Crunch is a fantastic, low-impact way to strengthen those crucial muscles. It’s not just about getting a ‘six-pack’; it’s about building a stable, healthy core that supports your spine and improves all your other movements. Plus, the aesthetic benefits are a nice bonus!”
8. Sit-Up: Classic Core Strengthening with a Twist 💪
The Sit-Up is a classic for a reason – it’s a straightforward and effective way to strengthen your rectus abdominis, the muscle responsible for that coveted “six-pack” look. While it sometimes gets a bad rap for neck strain, with proper form and modifications, it remains a valuable part of a comprehensive core routine. Leaps & Rebounds calls it a “classic core exercise; can be modified.”
How to Perform the Sit-Up (Step-by-step)
- Starting Position: Lie on your back on a yoga mat with your knees bent and feet flat on the floor, hip-width apart. You can place your hands behind your head (lightly, without pulling on your neck), across your chest, or extended forward.
- Engage Core: Press your lower back into the floor and engage your abdominal muscles.
- Lift Your Torso: Exhale as you slowly lift your head, then shoulders, then upper back off the floor, curling your torso towards your knees.
- Reach the Top: Continue until your chest is close to your thighs, or as far as you can comfortably go without straining your neck or lower back.
- Lower with Control: Inhale as you slowly reverse the movement, lowering your torso back down to the starting position, vertebra by vertebra.
- Repeat: Perform for the desired number of repetitions.
VPT™ Pro Tip: Protect Your Neck!
A common mistake is pulling on your neck to lift your body. Instead, imagine an apple-sized space between your chin and chest. Leaps & Rebounds advises to “avoid pulling on neck” and “engage abs throughout, pulling belly button inward.” If you struggle with neck strain, try placing your hands across your chest or extending them forward, which reduces the leverage and makes the movement easier.
Variations and Progression
- Beginner (Assisted Sit-Up): Have a partner hold your feet, or hook your feet under a sturdy piece of furniture (like a couch). You can also use a stability ball for support.
- Intermediate: Perform unassisted, focusing on slow, controlled movements.
- Advanced (Weighted Sit-Up): Hold a light dumbbell or weight plate across your chest for added resistance.
- Russian Twist: The first YouTube video includes Russian Twists, which are a great way to target the obliques and can be done with heels on the ground (beginner) or lifted (advanced) #featured-video.
Muscles Targeted
- Primary: Rectus Abdominis, Obliques
- Secondary: Hip Flexors
Why We Love It: The Foundation of Core Strength
“The Sit-Up has been a cornerstone of core training for decades, and for good reason,” says Maria, our fitness historian and trainer. “It’s a straightforward way to build strength in the rectus abdominis. While newer exercises offer different benefits, mastering the basic sit-up with proper form provides a solid foundation. It’s a great benchmark for core endurance and strength, and when done correctly, it’s incredibly effective.”
9. Mountain Climber: Cardio Meets Core in One Explosive Move ⛰️
Get ready to elevate your heart rate and torch your core simultaneously with the Mountain Climber! This dynamic exercise is a fantastic blend of cardiovascular training and core strengthening, making it a staple in many high-intensity interval training (HIIT) routines. Leaps & Rebounds accurately describes it as “cardio & core; increases stamina.” The first YouTube video also features Mountain Climbers, encouraging advanced users to pick up the pace #featured-video.
How to Perform the Mountain Climber (Step-by-step)
- Starting Position: Begin in a high plank position. Your hands should be directly under your shoulders, fingers spread wide, and your body forming a straight line from head to heels. Engage your core tightly.
- Initiate the Movement: Drive one knee towards your chest, keeping your core engaged and hips stable.
- Switch Legs: As you return the first leg to the plank position, immediately drive the other knee towards your chest.
- Maintain Form: Continue alternating legs in a rapid, controlled motion, as if you’re running in place while in a plank.
- Keep Hips Stable: A crucial tip from Leaps & Rebounds is to “keep hips stable; alternate legs quickly.” Avoid letting your hips pike up or sag down. Maintain that straight line from head to heels.
VPT™ Pro Tip: Breathe and Brace!
It’s easy to hold your breath during intense exercises like Mountain Climbers. Remember to breathe rhythmically! Inhale as one leg extends, exhale as the other drives in. Also, actively brace your core throughout – imagine someone is about to punch you in the stomach. This protects your lower back and maximizes core engagement.
Variations and Progression
- Beginner (Slow Climber): Perform the movement slowly, focusing on bringing your knee all the way to your chest with control before switching.
- Intermediate: Increase the pace, aiming for a consistent, moderate speed.
- Advanced (Cross-Body Climber): Drive your knee towards the opposite elbow, adding an oblique twist. Or, as the first YouTube video suggests, simply pick up the pace for a more intense cardio burst.
- Spiderman Climber: Bring your knee to the outside of your elbow, similar to the Spider Crawl, but with a faster pace.
Muscles Targeted
- Primary: Rectus Abdominis, Obliques, Transverse Abdominis (core), Hip Flexors
- Secondary: Shoulders, Triceps (for plank stability), Quadriceps
Why We Love It: The Ultimate Efficiency Move
“Mountain Climbers are one of my go-to exercises when I’m short on time but want a full-body blast,” says Coach Ben, our HIIT specialist. “They hit your cardio, your core, and even your shoulders, all in one dynamic movement. I love throwing them into circuits because they get your heart rate up fast and really challenge your endurance. Plus, there’s something incredibly satisfying about the rhythm of them once you get going!”
10. Pistol Squat: The King of Single-Leg Strength 👑
If you’re looking for an exercise that truly tests your leg strength, balance, and mobility, the Pistol Squat is it. This advanced single-leg squat is a testament to body control and power, and mastering it is a significant fitness achievement. Leaps & Rebounds aptly calls it an “advanced single-leg squat; builds leg strength & balance.”
How to Perform the Pistol Squat (Step-by-step)
- Starting Position: Stand tall with your feet hip-width apart. Shift your weight onto one leg, extending the other leg straight out in front of you. You can extend your arms forward for balance.
- Initiate the Descent: Keeping your chest up and core engaged, slowly begin to lower your body by bending the knee of your standing leg.
- Maintain Balance: As you descend, keep your extended leg off the ground and as straight as possible. Focus on keeping your balance throughout the movement.
- Deep Squat: Lower yourself until your glutes are close to your heel, or as deep as your mobility allows while maintaining good form. Your extended leg should ideally remain parallel to the floor.
- Ascend: Drive through the heel of your standing leg, powerfully pushing yourself back up to the starting position.
- Repeat: Perform for the desired number of repetitions, then switch legs.
VPT™ Pro Tip: Warm-Up and Progress Gradually!
“Warm up hips & ankles; progress gradually,” is excellent advice from Leaps & Rebounds. The Pistol Squat requires significant ankle and hip mobility. Don’t jump straight into it! Spend time on ankle mobility drills (like calf raises and ankle rotations) and hip flexor stretches.
Variations and Progression
- Beginner (Assisted Pistol Squat):
- Holding onto Support: Use a sturdy pole, doorframe, or resistance band for assistance as you lower and raise.
- Box Pistol Squat: Squat down to a box or chair, gradually decreasing the height of the box as you get stronger.
- Counterbalance: Hold a light weight (like a small dumbbell or even a book) out in front of you. This helps counterbalance your weight and makes the squat easier.
- Intermediate (Elevated Pistol Squat): Stand on a slightly elevated surface (like a step) so your non-working leg can hang freely, allowing for a deeper squat without hitting the floor.
- Advanced: The full, unassisted Pistol Squat is the goal! To increase difficulty, slow down the tempo or add a pause at the bottom.
Muscles Targeted
- Primary: Quadriceps, Gluteus Maximus, Hamstrings (of the standing leg)
- Secondary: Calves, Core (for balance and stability), Hip Abductors/Adductors
Why We Love It: Unilateral Powerhouse
“The Pistol Squat is one of those ‘wow’ exercises that truly showcases your body’s capabilities,” says Dr. Anya, our biomechanics expert. “It’s not just about strength; it’s about incredible balance, coordination, and mobility. Unilateral exercises like the Pistol Squat are vital for correcting muscle imbalances, improving athletic performance, and preventing injuries. When a client finally nails their first Pistol Squat, the look of accomplishment is priceless!”
11. Burpee: The Full-Body Fat-Burning Beast 😈
Ah, the burpee. It’s the exercise that fitness enthusiasts love to hate, and hate to love! But there’s no denying its power: the burpee is a full-body, high-intensity exercise that combines a squat, plank, push-up, and jump into one explosive movement. It’s a phenomenal calorie burner and a fantastic way to build cardiovascular endurance and muscular strength. Leaps & Rebounds calls it a “full-body & cardio; combines squat, plank, push-up, jump.”
How to Perform the Burpee (Step-by-step)
- Starting Position (Stand): Begin standing tall with your feet shoulder-width apart.
- Squat Down: Hinge at your hips and squat down, placing your hands on the floor directly in front of your feet, shoulder-width apart.
- Jump Back to Plank: In one fluid motion, kick your feet back behind you, landing in a high plank position. Your body should form a straight line from head to heels.
- Push-Up (Optional): From the plank, perform one push-up (chest to the floor, then push back up).
- Jump Feet Forward: Immediately jump your feet back towards your hands, landing in a squat position.
- Jump Up: Explode upwards into a vertical jump, reaching your arms overhead.
- Land Softly: Land softly with bent knees, absorbing the impact, and immediately transition into the next repetition.
- Repeat: Perform for the desired number of repetitions.
VPT™ Pro Tip: Focus on Movement Pattern, Not Perfection!
“Focus on movement pattern, not perfection,” is a great quote from Leaps & Rebounds, especially for burpees. It’s a complex movement, and it’s okay if your first few aren’t perfectly smooth. Focus on linking the movements together. And remember, “a 20-minute home workout is better than no physical activity” (Healthline), so even a few burpees are better than none!
Variations and Progression
- Beginner (Modified Burpee):
- Step Back Instead of Jump: Instead of jumping your feet back to plank, step one foot back, then the other. Then step one foot forward, then the other.
- Skip the Push-Up: Omit the push-up entirely, going straight from plank to jumping feet forward.
- No Jump at the Top: Instead of jumping at the end, simply stand up tall and reach overhead.
- The first YouTube video includes “Walk Down Planks” which is a good precursor to the burpee’s plank transition, where you stand, walk hands out to a plank, then walk hands back to stand #featured-video.
- Intermediate: Perform the full burpee as described above.
- Advanced (Burpee with Tuck Jump or Box Jump): Add a tuck jump at the top, bringing your knees to your chest, or jump onto a low, sturdy box.
Muscles Targeted
- Primary: Quadriceps, Hamstrings, Glutes, Chest, Shoulders, Triceps, Core
- Secondary: Calves, Hip Flexors, pretty much everything!
Why We Love It: The Ultimate Metabolic Booster
“If I had to pick one exercise to do for the rest of my life, it might just be the burpee,” says Coach Sam, our metabolic conditioning guru. “It’s incredibly efficient, hitting every major muscle group and skyrocketing your heart rate in seconds. It’s tough, no doubt, but the results speak for themselves. Burpees are fantastic for fat burning, building endurance, and just feeling like an absolute powerhouse. They’re a true test of grit!”
12. Handstand Wall Walk: Defying Gravity for Upper Body Power 🤸 ♀️
Ready to literally turn your world upside down? The Handstand Wall Walk is an advanced exercise that builds incredible upper body strength, shoulder stability, and core control. It’s a fantastic way to progress towards freestanding handstands and develop a powerful physique. Leaps & Rebounds correctly identifies it as an “upper body & core strength; advanced move.”
How to Perform the Handstand Wall Walk (Step-by-step)
- Starting Position: Begin in a push-up position with your feet close to a wall. Your hands should be shoulder-width apart, fingers spread.
- Walk Feet Up the Wall: One foot at a time, start walking your feet up the wall. As your feet move higher, simultaneously walk your hands closer to the wall.
- Achieve Handstand Position: Continue walking your hands closer to the wall and your feet higher until your body is in a vertical handstand position, with your chest facing the wall. Your hands should be about 6-12 inches from the wall, and your body should be as straight as possible, with your core engaged.
- Hold (Optional): You can hold this handstand position for a few seconds to build isometric strength.
- Walk Down: Slowly and with control, reverse the movement. Walk your hands away from the wall as you walk your feet back down the wall, returning to the starting push-up position.
- Repeat: Perform for the desired number of repetitions.
VPT™ Pro Tip: Safety First!
“Safety: Practice handstands against wall first,” is a crucial piece of advice from Leaps & Rebounds. Before attempting the walk, ensure you’re comfortable kicking up into a static handstand against the wall. Always clear the area around you, and if you’re unsure, have a spotter. Focus on keeping your core tight and your gaze slightly forward between your hands.
Variations and Progression
- Beginner (Static Wall Handstand): Start by simply kicking up into a handstand against the wall and holding it for time. Focus on maintaining a straight body line.
- Intermediate (Partial Wall Walk): Don’t walk all the way into a full vertical handstand. Walk your feet only partway up the wall, then walk back down. Gradually increase the height.
- Advanced: The full Handstand Wall Walk is already very advanced. To increase the challenge, try holding the top position for longer, or perform Handstand Push-Ups against the wall.
Muscles Targeted
- Primary: Deltoids (shoulders), Triceps Brachii, Trapezius (upper back)
- Secondary: Core (rectus abdominis, obliques, transverse abdominis), Forearms (for grip)
Why We Love It: Unlocking New Levels of Strength
“The Handstand Wall Walk is one of those exercises that truly makes you feel like an athlete,” exclaims Coach Leo, our calisthenics expert. “It’s incredibly empowering to defy gravity and build such immense upper body and core strength. I love guiding clients through the progression – from simply holding a wall handstand to finally walking all the way up. It builds not just physical strength, but also incredible mental fortitude and body awareness. It’s a game-changer for anyone serious about bodyweight mastery.”
13. Standing Long Jump: Explosive Power Training at Home 🚀
Want to unleash your inner athlete and develop explosive power in your lower body? The Standing Long Jump is a fantastic plyometric exercise that requires no equipment and can be done in any open space. It targets your glutes, quads, and hamstrings, helping you generate force quickly. Leaps & Rebounds notes it “targets glutes, quads, hamstrings.”
How to Perform the Standing Long Jump (Step-by-step)
- Starting Position: Stand with your feet hip-width apart, toes pointing forward. Find a clear, open space with enough room to jump forward and land safely.
- Prepare to Jump: Bend your knees slightly, hinge at your hips, and swing your arms back behind you. This is your “load” phase, where you’ll generate momentum.
- Explode Forward: In one powerful, fluid motion, swing your arms forward and up, simultaneously pushing off the ground with both feet. Drive your hips forward and jump as far forward as you can.
- Land Softly: Land softly on both feet, absorbing the impact by bending your knees and hips. Your landing should be controlled, like a deep squat, to protect your joints.
- Stabilize: Hold your landing position for a moment to ensure you’ve maintained balance.
- Reset: Stand up, walk back to your starting point, and prepare for the next jump.
- Repeat: Perform for the desired number of repetitions.
VPT™ Pro Tip: Focus on Forward Momentum, Soft Landings!
“Focus on forward momentum, soft landings,” is excellent advice from Leaps & Rebounds. The power comes from your hips and glutes, not just your knees. Think about projecting your body forward, not just up. And always prioritize a soft, controlled landing to prevent injury.
Variations and Progression
- Beginner (Broad Jump to Stand): Focus on the jump and landing. Instead of immediately resetting, stand up tall after landing.
- Intermediate: Perform the full Standing Long Jump, focusing on maximizing distance while maintaining a soft landing. Leaps & Rebounds suggests “Perform 8-10 jumps per set, rest 30 sec.”
- Advanced (Continuous Long Jumps): Immediately transition from your landing into the next jump, minimizing rest between jumps. This adds a significant cardiovascular and endurance challenge.
- Jumping Lunges: Healthline lists “Jumping Lunges” as an advanced plyometric exercise, which also builds explosive power.
Muscles Targeted
- Primary: Gluteus Maximus, Quadriceps, Hamstrings, Calves
- Secondary: Core (for stability during jump and landing)
Why We Love It: Unlocking Explosive Power
“The Standing Long Jump is one of my favorite ways to assess and train explosive power,” says Coach Ryan, our sports performance specialist. “It’s a primal movement that translates directly to athletic performance – think sprinting, jumping for a rebound, or quickly changing direction. It’s incredibly empowering to see clients improve their jump distance, knowing they’re building real, functional power that makes them feel stronger and more agile in everyday life.”
14. Side Plank: Core Stability and Oblique Strength 💪
While the traditional plank is excellent for your rectus abdominis, the Side Plank is your secret weapon for targeting the often-neglected oblique muscles and building incredible core stability. It’s fantastic for improving posture, preventing lower back pain, and strengthening the muscles that support rotational movements. Leaps & Rebounds highlights its benefits for “oblique & core strength; improves stability.”
How to Perform the Side Plank (Step-by-step)
- Starting Position: Lie on your side on a yoga mat, with your body in a straight line. Prop yourself up on your forearm, ensuring your elbow is directly under your shoulder. Stack your feet one on top of the other.
- Engage Core: Brace your core and lift your hips off the floor, so your body forms a straight line from your head to your heels.
- Hold: Maintain this straight line, keeping your hips from sagging or piking up. Your top arm can be placed on your hip or extended towards the ceiling.
- Breathe: Remember to breathe deeply and consistently throughout the hold.
- Lower with Control: Slowly lower your hips back down to the starting position.
- Repeat: Perform for the desired duration, then switch to the other side.
VPT™ Pro Tip: Keep Body in a Straight Line!
“Keep body in a straight line; switch sides,” is a key tip from Leaps & Rebounds. A common mistake is letting the hips sag towards the floor. Actively push through your forearm and engage your obliques to keep your body rigid and straight. Imagine a string pulling you up from your top hip.
Variations and Progression
- Beginner (Kneeling Side Plank): Bend your knees and support yourself on your forearm and knees, keeping your body in a straight line from head to knees. Healthline also suggests a “Kneeling Side Plank with Hip Abduction” for combined core and hip strength.
- Intermediate: Perform the standard Side Plank, holding for 20-30 seconds initially, as Leaps & Rebounds recommends. Gradually increase the hold time.
- Advanced (Side Plank with Leg Lift): While holding the side plank, lift your top leg a few inches towards the ceiling. This adds an extra challenge for your obliques and hip abductors. Healthline lists “Side Plank with Hip Abduction” as an advanced full-body challenge.
- Side Plank with Rotation: From the side plank, reach your top arm under your body, rotating your torso, then return to the starting position.
Muscles Targeted
- Primary: Obliques (internal and external), Transverse Abdominis, Gluteus Medius (for hip stability)
- Secondary: Shoulders (deltoids), Quadratus Lumborum (lower back stabilizer)
Why We Love It: The Unsung Hero of Core Strength
“The Side Plank is often overlooked, but it’s an absolute powerhouse for core health,” says Dr. Anya. “It directly strengthens the muscles that stabilize your spine and pelvis, which is crucial for preventing lower back pain and improving performance in almost every other exercise. I’ve seen clients dramatically improve their posture and reduce discomfort simply by consistently incorporating side planks into their routine. It’s the unsung hero of core strength!”
15. Marching In Place: Low-Impact Cardio for Every Fitness Level 🚶 ♀️
Sometimes, the simplest exercises are the most effective. Marching In Place might seem basic, but it’s a fantastic low-impact cardiovascular exercise that can be done anywhere, anytime. It’s perfect for warming up, cooling down, or as a standalone cardio session, especially for beginners or those recovering from injury. Leaps & Rebounds notes it’s “low-impact cardio; warms up or standalone.” The first YouTube video also includes “High Knees” which is an advanced form of marching in place, encouraging users to go faster #featured-video.
How to Perform Marching In Place (Step-by-step)
- Starting Position: Stand tall with your feet hip-width apart, arms relaxed by your sides.
- Lift One Knee: Lift one knee towards your chest, bringing your thigh parallel to the floor (or as high as comfortable).
- Arm Movement: Simultaneously, swing the opposite arm forward, as if you’re marching.
- Lower and Switch: Lower your foot back to the ground with control, and immediately switch to the other leg and arm.
- Maintain Posture: Keep your chest up, shoulders back, and core gently engaged throughout the movement.
- Continue: Maintain a steady, rhythmic pace.
VPT™ Pro Tip: Adjust Difficulty!
“Adjust difficulty; can be done anywhere,” is a great quote from Leaps & Rebounds. To increase the intensity, simply increase your pace, lift your knees higher, or add a slight hop between steps. To decrease it, slow down and focus on controlled movements.
Variations and Progression
- Beginner: Focus on a slow, controlled march, ensuring good posture and arm swing.
- Intermediate: Increase your pace and knee height.
- Advanced (High Knees): Drive your knees up as high and as fast as you can, almost like running in place. This is a fantastic high-intensity cardio burst, as demonstrated in the first YouTube video #featured-video.
- Marching with Arm Circles: Add arm circles (forward or backward) to incorporate upper body movement and warm up your shoulders.
Muscles Targeted
- Primary: Quadriceps, Hamstrings, Glutes, Calves
- Secondary: Core (for stability), Shoulders (with arm swing)
Why We Love It: Accessible Cardio for All
“Marching in place is often underestimated, but it’s a truly inclusive exercise,” says Dr. Lena. “It’s perfect for anyone, regardless of age or fitness level, to get their heart rate up safely. I often recommend it to clients who are just starting their fitness journey or those who need a gentle way to stay active. It proves that you don’t need to run a marathon to get cardiovascular benefits – sometimes, just moving your body consistently is enough!”
16. Single Leg Stand: Balance and Coordination Made Simple 🧘
Balance is a fundamental aspect of fitness that often gets overlooked, yet it’s crucial for preventing falls, improving athletic performance, and maintaining functional independence as we age. The Single Leg Stand is a deceptively simple exercise that dramatically improves your balance and ankle stability. Leaps & Rebounds notes its benefits for “balance & ankle stability.”
How to Perform the Single Leg Stand (Step-by-step)
- Starting Position: Stand tall with your feet hip-width apart, arms relaxed by your sides. Find a focal point in front of you to help with stability.
- Lift One Leg: Gently shift your weight onto one foot. Slowly lift the other foot off the ground, bending your knee slightly. You can keep the lifted foot close to the standing leg or extend it slightly forward or to the side.
- Hold: Maintain your balance, keeping your standing leg slightly bent (not locked out) and your core gently engaged. Try to keep your hips level.
- Breathe: Breathe naturally throughout the hold.
- Lower and Switch: Slowly lower your lifted foot back to the ground and switch to the other leg.
- Repeat: Perform for the desired duration on each leg.
VPT™ Pro Tip: Close Your Eyes for Added Difficulty!
“Close eyes for added difficulty,” is a fantastic tip from Leaps & Rebounds. Removing visual cues forces your proprioceptive system (your body’s sense of position) to work harder, significantly challenging your balance. Start by holding for 15-30 seconds, as suggested by Leaps & Rebounds, and gradually increase.
Variations and Progression
- Beginner (Assisted Stand): Stand near a wall or sturdy chair and lightly touch it with one finger for support if needed. Gradually reduce your reliance on the support.
- Intermediate: Perform the standard Single Leg Stand without support. Try holding for longer durations (e.g., 30-60 seconds).
- Advanced:
- Close Your Eyes: As mentioned, this is a significant progression.
- Dynamic Arm Movements: While standing on one leg, perform arm circles or reach your arms in different directions.
- Single Leg Squat (Pistol Squat Prep): While standing on one leg, perform a small, controlled squat on that leg. This is a great precursor to the Pistol Squat.
Muscles Targeted
- Primary: Ankle Stabilizers (peroneals, tibialis anterior), Gluteus Medius (for hip stability), Core (for overall balance)
- Secondary: Quadriceps, Hamstrings (of the standing leg)
Why We Love It: The Foundation of Agility
“Balance is often the first thing to decline as we age, but it’s also one of the easiest to maintain and improve with consistent practice,” says Emily. “The Single Leg Stand is so simple, yet so powerful. I’ve seen clients dramatically improve their stability, reduce their risk of falls, and even feel more confident in their movements just by incorporating this into their daily routine. It’s a fundamental exercise for anyone looking to maintain agility and independence.”
17. Hip Abduction: Strengthen Your Hips and Prevent Injuries 🦵
Strong hip abductors (the muscles on the outside of your hips) are crucial for hip stability, knee health, and overall lower body function. They play a vital role in walking, running, and preventing common injuries like IT band syndrome and runner’s knee. The Hip Abduction exercise is a simple yet effective way to target these important muscles. Leaps & Rebounds states it’s “key for posture & injury prevention.”
How to Perform Hip Abduction (Side-Lying Position) (Step-by-step)
- Starting Position: Lie on your side on a yoga mat, with your body in a straight line. You can support your head with your bottom arm or rest it on a pillow. Stack your legs one on top of the other, keeping them straight.
- Engage Core: Gently brace your core to stabilize your torso and prevent rocking.
- Lift Top Leg: Keeping your top leg straight and your foot flexed (toes pointing forward, not up), slowly lift your top leg towards the ceiling. Only go as high as you can without tilting your pelvis or arching your lower back.
- Hold Briefly: Pause for a second at the top, feeling the contraction in your outer hip.
- Lower with Control: Slowly lower your leg back down to the starting position, maintaining control. Don’t just let it drop.
- Repeat: Perform for the desired number of repetitions, then switch to the other side.
VPT™ Pro Tip: Focus on the Outer Hip!
A common mistake is to rotate the leg outwards or use momentum. Focus on keeping your hips stacked and your toes pointing forward. Imagine you’re sliding your leg up a wall. Leaps & Rebounds suggests performing it “in side-lying or side plank position,” which is excellent advice.
Variations and Progression
- Beginner: Perform the side-lying hip abduction with a smaller range of motion.
- Intermediate:
- Resistance Band: Place a resistance band around your ankles or just above your knees for added challenge.
- Side Plank with Hip Abduction: As mentioned by Healthline, combine the side plank with a leg lift for a more advanced, full-body challenge.
- Advanced:
- Standing Hip Abduction: Stand tall and lift one leg out to the side, maintaining balance. This adds a balance component.
- Cable Machine (at gym): If you ever venture to a gym, a cable machine can provide consistent resistance for standing hip abductions.
Muscles Targeted
- Primary: Gluteus Medius, Gluteus Minimus, Tensor Fasciae Latae (TFL)
- Secondary: Core (for stability)
Why We Love It: Injury Prevention Powerhouse
“As a physical therapist, I can’t stress enough the importance of strong hip abductors,” says Dr. Lena. “They are absolutely critical for knee stability and preventing issues like runner’s knee, IT band syndrome, and even lower back pain. Many people have weak hip abductors due to prolonged sitting, and this simple exercise can make a world of difference. It’s truly a powerhouse for injury prevention and overall lower body health.”
18. Yoga Poses: Flexibility, Strength, and Mindfulness at Home 🧘 ♀️
Yoga is more than just stretching; it’s a holistic practice that integrates physical postures (asanas), breathing techniques (pranayama), and meditation to improve flexibility, strength, balance, and mental well-being. It’s perfectly suited for at-home practice, requiring minimal space and often just a yoga mat. Leaps & Rebounds notes its benefits for “flexibility, balance, strength.”
The Benefits of Bringing Yoga Home
- Stress Reduction: The mindful movement and breathwork in yoga are incredibly effective at calming the nervous system and reducing stress.
- Improved Flexibility: Regular practice increases your range of motion, making everyday movements easier and reducing stiffness.
- Enhanced Strength: Many poses are isometric holds that build functional strength throughout your body, especially in your core and stabilizing muscles.
- Better Balance: Holding various poses on one leg or with shifting weight dramatically improves your balance and proprioception.
- Mind-Body Connection: Yoga encourages you to be present, fostering a deeper connection between your physical sensations and mental state.
Essential Yoga Poses for Your At-Home Practice
Here are some foundational poses, many of which are highlighted by Leaps & Rebounds, that you can easily incorporate into your routine:
- Downward-Facing Dog (Adho Mukha Svanasana):
- How to: Start on hands and knees. Lift hips towards the ceiling, forming an inverted V-shape. Press palms and heels towards the mat.
- Benefits: Stretches hamstrings, calves, and lengthens the spine. Strengthens arms and legs.
- Warrior II (Virabhadrasana II):
- How to: Step one foot back, turn it parallel to the short edge of the mat. Bend front knee to 90 degrees, keeping it over the ankle. Extend arms out to the sides, gaze over front hand.
- Benefits: Strengthens legs and core, opens hips and chest, builds stamina.
- Plank Pose (Phalakasana):
- How to: From hands and knees, extend legs back, forming a straight line from head to heels. Engage core, press through hands.
- Benefits: Full-body strength, especially core, shoulders, and arms. (Also seen in the first YouTube video as a modified/full plank #featured-video).
- Cobra Pose (Bhujangasana):
- How to: Lie face down, hands under shoulders. Press tops of feet into mat. Inhale, lift chest off floor, keeping elbows close to body.
- Benefits: Strengthens spine, stretches chest and abdomen, improves posture.
- Tree Pose (Vrksasana):
- How to: Stand tall. Shift weight to one foot. Place sole of other foot on inner thigh, calf, or ankle (avoiding knee). Bring hands to prayer at chest or overhead.
- Benefits: Improves balance, strengthens ankles and legs, calms the mind.
- Child’s Pose (Balasana):
- How to: Kneel, sit on heels. Fold forward, resting torso on thighs, forehead on mat. Arms can be extended forward or back by feet.
- Benefits: Gentle stretch for hips, thighs, and ankles. Calms the brain and helps relieve stress and fatigue. Perfect for a cool-down.
VPT™ Pro Tip: Focus on Breath & Mindful Movement!
“Focus on breath & mindful movement,” is the golden rule for yoga, as Leaps & Rebounds reminds us. Don’t just go through the motions. Connect your breath to each movement, allowing it to guide you deeper into poses. This mindful approach is what truly sets yoga apart and maximizes its benefits.
Essential Equipment: Your Yoga Mat
While you can technically do yoga on any soft surface, a good yoga mat provides cushioning, grip, and defines your personal practice space.
👉 Shop Yoga Mats on:
- Manduka PRO Yoga Mat: Amazon | Manduka Official Website
- Liforme Yoga Mat: Amazon | Liforme Official Website
- Gaiam Premium Yoga Mat: Amazon | Gaiam Official Website
19. Strength Training Without Equipment: Bodyweight and Household Items 💪
Think you need a gym full of weights to build muscle? Think again! Bodyweight strength training is incredibly effective for building muscle mass, improving endurance, and boosting overall fitness. As Nerd Fitness confidently states, “Bodyweight exercises can build muscle with proper progression.” And the best part? Your home is already packed with “equipment” you can use!
The Power of Bodyweight Training
Bodyweight exercises use your own mass as resistance. This means they’re inherently functional, training your body to move efficiently and powerfully in real-world situations. They also improve body awareness, coordination, and stability.
Key Principles for Bodyweight Muscle Building:
- Progressive Overload: This is the secret sauce! As Nerd Fitness explains, “You want to know: Can you build muscle mass with bodyweight exercises? Yes! As long as you do what’s called ‘progressive overload.'” This means continually challenging your muscles by:
- Increasing Reps/Sets: Doing more repetitions or more rounds of exercises.
- Reducing Rest Times: Shortening the breaks between sets.
- Slower Movements (Time Under Tension): Taking longer to perform each rep (e.g., 3 seconds down, 3 seconds up).
- Harder Variations: Moving from knee push-ups to full push-ups, or from chair squats to pistol squats.
- Unilateral Training: Focusing on one limb at a time (e.g., single-leg squats, single-arm push-ups) to increase the load on that limb.
- Consistency: Showing up regularly is more important than one super-intense session.
- Proper Form: Always prioritize technique to prevent injury and ensure the target muscles are working effectively.
Bodyweight Exercise Progression Examples
| Exercise Type | Beginner Variation | Intermediate Variation | Advanced Variation |
|---|---|---|---|
| Pushing (Chest/Triceps) | Wall Push-Up | Knee Push-Up | Full Push-Up |
| Pulling (Back/Biceps) | Inverted Row (under table) | Towel Row (door frame) | Chin-Up (if bar available) |
| Squatting (Legs/Glutes) | Chair Squat | Bodyweight Squat | Pistol Squat |
| Lunging (Legs/Glutes) | Supported Lunge | Forward/Reverse Lunge | Jumping Lunge |
| Core (Abs/Back) | Forearm Plank (on knees) | Forearm Plank (full) | Plank with Alternating Leg Lift |
Leveraging Household Items for Added Resistance
Don’t have dumbbells? No problem! Your home is full of potential weights and resistance tools:
- Milk Jugs/Water Bottles: Fill them with water or sand for makeshift dumbbells. Nerd Fitness specifically mentions using a “milk jug or similar” for dumbbell rows.
- Use for: Bicep curls, overhead presses, lateral raises, goblet squats, single-arm rows.
- Backpack: Load a backpack with books, canned goods, or water bottles for added weight during squats, lunges, or push-ups.
- Towel: Use a towel for “towel rows” by wrapping it around a sturdy pole or door handle and pulling. You can also use it for hamstring curls by placing your heels on it on a slippery floor.
- Sturdy Chair/Bench: Essential for tricep dips, elevated push-ups, step-ups, and box squats.
- Resistance Bands: While technically “equipment,” they’re inexpensive, portable, and incredibly versatile for adding resistance to almost any bodyweight exercise (squats, glute bridges, hip abductions, bicep curls, shoulder presses).
👉 Shop Resistance Bands on:
- TheraBand Resistance Bands Set: Amazon | TheraBand Official Website
- Fit Simplify Resistance Loop Bands: Amazon
- Serious Steel Fitness Resistance Bands: Amazon | Serious Steel Official Website
VPT™ Pro Tip: Get Creative!
“We’ve seen clients get incredibly creative with their home setups,” says Coach Ben. “One client used a sturdy kitchen counter for inverted rows, another used heavy laundry detergent bottles for bicep curls. The key is to be safe, ensure your ‘equipment’ is stable, and focus on the muscle contraction. Your body doesn’t know if it’s lifting a fancy dumbbell or a jug of water – it just knows resistance!”
For more detailed guides on bodyweight movements, explore our Exercise Demonstrations and Home-based Workouts categories.
20. Cardiovascular Exercises You Can Do in Your Living Room 🏃 ♀️💨
Who needs a treadmill when you have a living room? Cardiovascular exercise, or cardio, is vital for heart health, endurance, and calorie burning. It gets your heart rate up, improves lung capacity, and can be incredibly fun! The good news is, you can get a fantastic cardio workout right at home with zero equipment. Leaps & Rebounds emphasizes that cardio “elevates heart rate; improves endurance.”
The Benefits of At-Home Cardio
- Heart Health: Strengthens your heart and improves blood circulation.
- Endurance: Increases your stamina for daily activities and other workouts.
- Weight Management: Burns calories and contributes to fat loss.
- Mood Booster: Releases endorphins, reducing stress and improving mood.
- Convenience: No travel time, no gym fees, just pure sweat!
Your At-Home Cardio Arsenal
Here are some dynamic, heart-pumping exercises you can do in your living room:
- Jumping Jacks:
- How to: Start standing with feet together, arms at sides. Jump feet out wide while swinging arms overhead. Jump feet back together, bringing arms back down.
- VPT™ Tip: Keep it light on your feet. For a lower-impact version, step one foot out at a time, swinging arms. The first YouTube video calls this a “Quiet Jack” for beginners, with the full jumping jack for advanced users #featured-video.
- High Knees:
- How to: March or run in place, driving your knees up towards your chest as high and as fast as you can. Pump your arms vigorously.
- VPT™ Tip: Focus on quick feet and a strong core. The first YouTube video demonstrates this, encouraging advanced users to go faster #featured-video.
- Butt Kicks:
- How to: Run in place, focusing on kicking your heels back towards your glutes with each step. Keep your chest up and pump your arms.
- VPT™ Tip: This is great for warming up the hamstrings.
- Imaginary Jump Rope:
- How to: Mimic the motion of jumping rope without the rope. Lightly bounce on the balls of your feet, rotating your wrists as if turning a rope.
- VPT™ Tip: Vary your jumps – two feet, one foot, alternating feet, high knees, criss-cross.
- Mountain Climbers:
- How to: (See detailed description in section 9). From a plank, alternate driving knees to chest.
- VPT™ Tip: Keep your hips stable and core tight. The first YouTube video features these, suggesting picking up the pace for advanced users #featured-video.
- Burpees:
- How to: (See detailed description in section 11). The ultimate full-body cardio and strength combo.
- VPT™ Tip: Use modifications if needed to maintain intensity and form.
- Squat Jumps:
- How to: Perform a regular squat, then explode upwards into a jump, landing softly back into a squat.
- VPT™ Tip: Ensure soft landings to protect your knees. The first YouTube video suggests jump squats for advanced users #featured-video.
- Alternating Reverse Lunges (with pace):
- How to: Step one leg back, drop the knee, then push off to return to standing, immediately switching legs. Increase the pace for cardio.
- VPT™ Tip: The first YouTube video includes these, noting advanced users can do alternating jump lunges #featured-video.
- Overhead Claps:
- How to: Stand with arms out to the sides, then quickly bring them together overhead to clap. Repeat rapidly.
- VPT™ Tip: This is a simple, low-impact way to get the upper body moving and heart rate up, as seen in the first YouTube video #featured-video.
- Alternate Side Steps (from squat):
- How to: From a low squat position, step right, then left, maintaining a low squat throughout.
- VPT™ Tip: The first YouTube video demonstrates this, suggesting speeding it up for advanced users #featured-video.
Crafting Your Cardio Circuit
Leaps & Rebounds suggests performing cardio exercises “in circuits; aim for 30 sec per exercise, increase over time.” We agree! Here’s a sample circuit:
Sample At-Home Cardio Circuit
| Exercise | Duration (Beginner) | Duration (Intermediate) | Duration (Advanced) | Rest Between Exercises |
|---|---|---|---|---|
| Jumping Jacks | 30 seconds | 45 seconds | 60 seconds | 10 seconds |
| High Knees | 30 seconds | 45 seconds | 60 seconds | 10 seconds |
| Butt Kicks | 30 seconds | 45 seconds | 60 seconds | 10 seconds |
| Mountain Climbers | 30 seconds | 45 seconds | 60 seconds | 10 seconds |
| Squat Jumps (or Squats) | 30 seconds | 45 seconds | 60 seconds | 10 seconds |
| Rest between rounds: | 60-90 seconds | 45-60 seconds | 30-45 seconds | |
| Rounds: | 2-3 | 3-4 | 4-5 |
VPT™ Pro Tip: The Talk Test!
“Work at a level where talking is possible but challenging,” is a fantastic guideline from Leaps & Rebounds. This ensures you’re working hard enough to get cardiovascular benefits without overdoing it. If you can sing, you need to work harder. If you can’t speak at all, ease up a bit!
For more dynamic cardio ideas, check out our Exercise Demonstrations and Home-based Workouts sections.
🏋️ ♂️ Crafting Your Perfect At-Home Workout Routine: Tips and Tricks
Now that you’ve got a fantastic arsenal of exercises, how do you put them all together into a routine that works for you? This is where the art of program design comes in, and our Virtual Personal Trainer™ team is here to guide you. Remember, the goal is to create a sustainable, effective routine that keeps you engaged and progressing.
1. Determine Your Frequency and Duration
- How Often? Nerd Fitness recommends performing a bodyweight routine “2-4 times weekly, while taking 48 hours off between workouts.” This allows for muscle recovery and growth. We generally suggest aiming for 3-5 days a week for overall fitness.
- How Long? Even a short, focused workout is incredibly beneficial. Healthline reminds us, “A 20-minute home workout is better than no physical activity.” The first YouTube video’s workout is a perfect example of a comprehensive 20-minute session #featured-video. Start with 20-30 minutes and gradually increase as your stamina improves.
2. Structure Your Workout: Warm-Up, Main Set, Cool-Down
A well-rounded workout always includes these three phases:
- Warm-Up (5-10 minutes):
- Purpose: Prepares your body for exercise, increases blood flow to muscles, and improves joint mobility.
- Examples: Light cardio like marching in place, arm circles, leg swings, torso twists, dynamic stretches. The first YouTube video starts with “Quiet Jacks” and other dynamic moves as a warm-up #featured-video. Nerd Fitness suggests “jogging, marching, jump rope, arm swings.”
- Main Workout (20-45 minutes):
- Purpose: The core of your session, focusing on strength, cardio, or a combination.
- Structure Options:
- Circuit Training: Perform a series of exercises back-to-back with minimal rest between them, then rest after completing the entire circuit. Repeat 2-5 rounds. This is a great way to combine strength and cardio, as seen in our cardio circuit table above. The first YouTube video uses supersets (performing two exercises back-to-back) with 30 seconds of “active rest” between them #featured-video.
- Supersets: Pair two exercises that work opposing muscle groups (e.g., push-ups and glute bridges) or the same muscle group (for extra intensity).
- Straight Sets: Perform all sets of one exercise before moving to the next.
- Cool-Down (5-10 minutes):
- Purpose: Gradually brings your heart rate down, improves flexibility, and aids muscle recovery.
- Examples: Static stretches (holding each stretch for 20-30 seconds), gentle yoga poses (like Child’s Pose), foam rolling. The first YouTube video concludes with overhead stretches, forward folds, quad stretches, and a chest opener #featured-video.
3. Embrace Progressive Overload
This is non-negotiable for continued progress! As Nerd Fitness emphasizes, “After 4-6 weeks, aim to improve reps or exercise difficulty.”
- How to Apply It:
- Increase Reps/Sets: If you can do 10 push-ups easily, try for 12, or add another set.
- Reduce Rest: Shorten your rest periods between sets or circuits.
- Increase Time Under Tension: Slow down the movement. For example, take 3 seconds to lower into a squat, pause for 1 second, then 2 seconds to stand up.
- Advance the Exercise: Move from a knee push-up to an elevated push-up, then to a full push-up.
- Add Resistance: Incorporate resistance bands or household items (as discussed in section 19).
4. Listen to Your Body and Prioritize Form
“It’s better to stop and take a break than to do an exercise incorrectly,” is a crucial reminder from Nerd Fitness. Your body will tell you what it needs.
- Pain vs. Discomfort: Muscle fatigue is normal; sharp, shooting, or persistent pain is not.
- Modify When Needed: Don’t be afraid to use beginner variations or take extra rest.
- Focus on Core Engagement: For almost every exercise, keeping your core tight protects your spine and enhances effectiveness. The first YouTube video frequently reminds viewers to “Keep your core nice and tight. Keep that belly button sucked in” #featured-video.
5. Incorporate Variety
Don’t get stuck in a rut! Mix up your exercises, try new combinations, or explore different types of workouts (e.g., a strength day, a cardio day, a yoga/mobility day). This keeps things fresh and ensures you’re challenging your body in different ways.
VPT™ Pro Tip: Plan Your Week!
“We encourage our clients to schedule their workouts like any other important appointment,” says Sarah. “Look at your week ahead and pencil in your workout times. This simple act of planning dramatically increases adherence. Even if it’s just 20 minutes, commit to it. And remember, our AI-powered virtual coach can help you build and adapt these routines seamlessly!”
For more in-depth guidance on structuring your workouts, check out our Fitness Guides.
🧘 ♀️ Mind-Body Connection: The Role of Mental Health in Home Fitness
It’s easy to focus solely on the physical benefits of exercise – stronger muscles, a leaner physique, improved endurance. But here at Virtual Personal Trainer™, we know that true fitness is holistic. The profound connection between your mind and body is undeniable, and at-home fitness offers a unique opportunity to nurture both.
Exercise: Your Natural Mood Booster
- Stress Reduction: Physical activity is a powerful stress reliever. When you exercise, your body releases endorphins, natural mood elevators that can help reduce feelings of stress and anxiety. A good sweat session can be a fantastic way to clear your head after a long day.
- Improved Sleep: Regular exercise can significantly improve sleep quality. And we all know how much better everything feels after a good night’s rest!
- Enhanced Self-Esteem: Achieving fitness goals, no matter how small, builds confidence and a sense of accomplishment. This positive feedback loop can greatly boost your self-esteem and body image.
- Cognitive Benefits: Studies show that exercise can improve memory, focus, and overall cognitive function source: Harvard Health.
- Mindfulness: Practices like yoga, as discussed in section 18, explicitly cultivate mindfulness, helping you stay present and reduce rumination. Even during intense cardio, focusing on your breath and body sensations can be a form of moving meditation.
The Unique Mental Benefits of Home Workouts
Working out at home offers specific mental advantages:
- Reduced Social Anxiety: For some, the gym environment can be intimidating. Home workouts eliminate this pressure, allowing you to focus purely on your movement without feeling judged.
- Comfort and Control: Being in your own space provides a sense of comfort and control. You can choose your music, your attire, and your pace without external distractions.
- Flexibility: The ability to fit a workout into any pocket of your day, without commuting, reduces mental barriers and stress associated with scheduling.
- Sense of Accomplishment: Consistently showing up for yourself, even when life is chaotic, builds incredible mental resilience and self-discipline.
VPT™ Pro Tip: Make it a Ritual!
“We encourage clients to view their home workout as a sacred ritual, a time just for them,” says Chloe. “It’s not just about burning calories; it’s about carving out space for self-care. Light a candle, put on your favorite music, or even just take a few deep breaths before you start. Treat it as an investment in your mental well-being, not just your physical health.”
Remember, your mental health is just as important as your physical health. If you’re struggling, exercise can be a powerful tool, but it’s also important to seek professional help if needed. For more insights on how lifestyle impacts your well-being, check out our Diet and Nutrition section, as nutrition plays a huge role in mental clarity and mood.
💡 Equipment Essentials for Home Workouts: What You Really Need
One of the biggest myths about working out is that you need a garage full of expensive gear. While fancy equipment can be fun, it’s absolutely not necessary for an effective at-home workout. As we’ve seen, your bodyweight is a powerful tool! However, a few key items can enhance your experience, add variety, and help you progress.
Here’s our Virtual Personal Trainer™ breakdown of what’s truly essential, what’s nice to have, and what you can probably skip for now:
Home Workout Essentials: The Must-Haves (Minimalist Approach)
| Item | Why You Need It ——————————–
⚡️ Quick Tips and Facts for At-Home Workouts
Welcome to Virtual Personal Trainer™! We know life gets busy, and hitting the gym isn’t always feasible. But guess what? Your living room, backyard, or even a small corner of your apartment can transform into your personal fitness studio! We’re here to prove that you don’t need fancy equipment or a hefty membership to achieve incredible results. In fact, many of the most effective exercises require nothing more than your own bodyweight and a dash of determination.
Before we dive into the nitty-gritty, here are some quick facts and expert tips to kickstart your at-home fitness journey:
- No Gym, No Problem! ✅ You can build significant strength, improve cardiovascular health, and boost flexibility using just your bodyweight. As the experts at Leaps & Rebounds put it, “No gym needed: Achieve full-body fitness using just body weight; equipment isn’t always necessary.”
- Consistency is King (or Queen)! 👑 Aim for 3-5 days of exercise per week. Even a quick 20-minute session is far better than none. The CDC recommends at least 150 minutes of moderate-intensity or 75 minutes of vigorous-intensity aerobic activity per week, plus muscle-strengthening activities on 2 or more days a week source: CDC.
- Form Over Speed! 🐢 Always prioritize proper technique to prevent injuries and maximize effectiveness. As Nerd Fitness wisely advises, “It’s better to stop and take a break than to do an exercise incorrectly.”
- Variety is the Spice of Life (and Fitness)! 🌶️ Combine strength, cardio, and flexibility exercises for a well-rounded routine. This not only keeps things interesting but also targets different muscle groups and energy systems.
- Warm-Up & Cool-Down are Non-Negotiable! 🔥 Don’t skip these crucial steps! A proper warm-up prepares your body, and a cool-down aids recovery. We’ll cover some great options later.
- Listen to Your Body! 👂 Pay attention to how you feel. If something hurts (beyond muscle fatigue), stop and reassess. Progression should be gradual.
- Nutrition Matters! 🍎 Remember, exercise and diet go hand-in-hand. As Nerd Fitness highlights, “You want to know: Can you build muscle mass with bodyweight exercises? Yes! As long as you do what’s called ‘progressive overload.'” But they also emphasize that “80% diet, 10-20% training” is key for weight loss.
Ready to transform your home into a powerhouse of health? Let’s explore the incredible world of at-home exercises! For a broader understanding of exercise types, check out our article on 7 Must-Know Types of Exercises for Total Fitness in 2026 💪.
🏠 The Evolution of At-Home Exercise: From Jane Fonda to Virtual Trainers
Remember the days of VHS tapes and leg warmers? Back in the 80s, icons like Jane Fonda brought fitness right into our living rooms, making at-home workouts a cultural phenomenon. Fast forward a few decades, and while the leg warmers might be gone (mostly!), the spirit of home fitness is stronger than ever.
The journey from bulky VCRs to sleek streaming apps and AI-powered virtual coaches has been nothing short of revolutionary. We’ve seen the rise of fitness DVDs, then YouTube gurus, and now, sophisticated platforms like Virtual Personal Trainer™ that bring personalized guidance directly to you. This evolution isn’t just about convenience; it’s about accessibility, personalization, and making fitness achievable for everyone, regardless of their schedule or location.
Our team at Virtual Personal Trainer™ has witnessed this transformation firsthand. We’ve seen how technology has democratized fitness, allowing us to reach and empower more people than ever before. With the integration of AI in fitness, your virtual coach can analyze your form, track your progress, and adapt your workouts in real-time, just like a human trainer would – sometimes even better! It’s an exciting time to be fit, and an even more exciting time to be fit from the comfort of your home. Want to dive deeper into how technology is shaping your sweat sessions? Explore our insights on AI In Fitness Industry.
1. Glute Bridge: Your Secret Weapon for a Stronger Booty 🍑
The Glute Bridge is a fantastic foundational exercise that targets your posterior chain – that’s your glutes and hamstrings – while also being incredibly kind to your lower back. It’s a staple in our at-home workout recommendations because it requires zero equipment and offers immense benefits for posture, strength, and even alleviating back discomfort. As Leaps & Rebounds notes, it “improves posture & alleviates back discomfort.”
How to Perform the Glute Bridge (Step-by-step)
- Starting Position: Lie on your back on a yoga mat or comfortable surface. Bend your knees, placing your feet flat on the floor about hip-width apart. Your heels should be close enough to your glutes that you can just touch them with your fingertips. Keep your arms by your sides, palms down.
- Engage Your Core: Before lifting, gently brace your core by pulling your belly button towards your spine. This helps protect your lower back.
- Lift Your Hips: Press through your heels and lift your hips off the floor towards the ceiling. Imagine you’re trying to create a straight line from your shoulders to your knees.
- Squeeze at the Top: At the peak of the movement, squeeze your glutes hard. This is where the magic happens! As Leaps & Rebounds emphasizes, “Squeezing glutes at the top makes a big difference.”
- Lower with Control: Slowly lower your hips back down to the starting position, maintaining control throughout the movement. Don’t just flop down!
- Repeat: Perform for the desired number of repetitions.
VPT™ Pro Tip: Mind-Muscle Connection Matters!
We often tell our clients that the Glute Bridge isn’t just about lifting your hips; it’s about feeling your glutes work. If you’re feeling it more in your lower back or hamstrings, try adjusting your foot placement slightly closer or further away, and really focus on that glute squeeze. Think about driving your knees forward, not just lifting your hips up.
Variations and Progression
- Beginner: Focus on perfect form with both feet on the ground.
- Intermediate (Bridged March): As Healthline suggests, once you’re comfortable, try lifting one foot off the ground for a “Bridged March,” alternating legs while keeping your hips stable.
- Advanced (Single-leg Glute Bridge): Extend one leg straight out, then perform the bridge with only one foot on the ground. This significantly increases the challenge for your glutes and core stability. Healthline calls this the “Single-leg Bridge with Leg Extended.” You can also add a light dumbbell or a resistance band across your hips for added weight.
Muscles Targeted
- Primary: Gluteus Maximus, Gluteus Medius, Gluteus Minimus (your glutes!)
- Secondary: Hamstrings, Core (erector spinae, rectus abdominis, obliques)
Why We Love It: Our Personal Story
“I used to suffer from nagging lower back pain, especially after long days at my desk,” shares Sarah, one of our certified trainers. “A colleague suggested incorporating glute bridges into my daily routine. I was skeptical at first, thinking it looked too simple. But within a few weeks, the difference was incredible! Strengthening my glutes took so much pressure off my lower back. Now, it’s the first exercise I recommend to anyone looking to build a strong foundation, whether they’re a beginner or an experienced athlete.”
2. Chair Squat: Mastering the Art of Functional Lower Body Strength 🪑
The squat is often called the “king of exercises” for a reason – it’s a fundamental human movement that builds incredible lower body strength and mobility. For those new to squats or looking to refine their form, the Chair Squat is an absolute game-changer. It provides a safe target to ensure you’re going deep enough without losing balance, making it “beginner-friendly with a chair for support,” as Leaps & Rebounds points out.
How to Perform the Chair Squat (Step-by-step)
- Starting Position: Stand in front of a sturdy chair, bench, or even a low coffee table. Your feet should be about shoulder-width apart, toes pointing slightly out. Stand tall, chest up, shoulders back.
- Initiate the Movement: Begin by hinging at your hips, as if you’re about to sit down. Keep your chest lifted and your gaze forward.
- Lower Down: Slowly lower your glutes towards the chair. Control the descent, making sure your knees track in line with your toes (don’t let them cave inward!).
- Tap or Sit: Gently tap the chair with your glutes, or briefly sit down if you need more support. The goal is to maintain tension in your legs, not to fully relax.
- Stand Up: Drive through your heels, squeezing your glutes, to push yourself back up to the starting standing position.
- Repeat: Complete the desired number of repetitions.
VPT™ Pro Tip: The “Invisible Chair” Test
Once you’re comfortable with the Chair Squat, try to perform it as if the chair isn’t there, but still aim for the same depth. This helps build confidence and strength for a full bodyweight squat. Remember to “maintain control for safety and effectiveness,” a tip echoed by Leaps & Rebounds.
Variations and Progression
- Beginner: Use a higher chair or a stack of sturdy books to reduce the range of motion. Focus on controlled descent and ascent.
- Intermediate (Hover or No Touch): As Leaps & Rebounds suggests, instead of fully sitting, “hover” just above the chair for a moment before standing back up. This increases time under tension.
- Advanced (Bodyweight Squat): Once you’ve mastered the chair squat, you can progress to a full bodyweight squat without any support. The first YouTube video also demonstrates standard squats, noting that advanced users can do jump squats for more intensity #featured-video.
- Overhead Squat: Healthline lists this as an advanced variation, improving mobility and core stability by holding your arms overhead.
Muscles Targeted
- Primary: Quadriceps, Hamstrings, Gluteus Maximus
- Secondary: Calves, Core (for stability)
Why We Love It: Building Confidence
“I used to dread squats,” admits Mark, our strength and conditioning specialist. “My knees would ache, and I felt wobbly. The chair squat changed everything for me and for countless clients. It’s a fantastic way to build the muscle memory and confidence needed to perform a proper squat. It teaches you to hinge at the hips, keep your chest up, and engage your core – all without the fear of falling backward!”
3. Knee Push-Up: Building Upper Body Strength Without the Strain 💪
The push-up is a phenomenal compound exercise, but let’s be honest, a full push-up can be incredibly challenging, especially when you’re starting out. That’s where the Knee Push-Up comes in! It’s an excellent modification that allows you to build the necessary upper body and core strength to eventually conquer a full push-up. Leaps & Rebounds rightly calls it a way to “build chest, shoulders, triceps; progression towards full push-up.”
How to Perform the Knee Push-Up (Step-by-step)
- Starting Position: Begin on your hands and knees, with your hands slightly wider than shoulder-width apart and directly under your shoulders. Your fingers should point forward.
- Form a Straight Line: Extend your legs back so your weight is supported by your hands and knees. Crucially, maintain a straight line from your head to your knees. Avoid letting your hips sag or pike up. This is a key point emphasized by Leaps & Rebounds.
- Lower Your Body: Keeping your core engaged and elbows pointing slightly backward (not flaring out to the sides), slowly lower your chest towards the floor. Go as low as you can with good form, ideally until your chest is just a few inches from the ground.
- Push Up: Press through your palms to push your body back up to the starting straight-line position.
- Repeat: Perform for the desired number of repetitions.
VPT™ Pro Tip: Controlled Movements are Key!
“Controlled movements are better than speed,” is a quote from Leaps & Rebounds that we wholeheartedly agree with. Don’t rush through your reps! Focus on the eccentric (lowering) phase and the concentric (pushing) phase. A common mistake is letting the hips drop first or pushing up with a “worm-like” motion. Keep that straight line! The first YouTube video also demonstrates a modified push-up on the knees, emphasizing a straight back and lowering the chest to the ground #featured-video.
Variations and Progression
- Beginner (Wall Push-Up): Start with wall push-ups, standing a few feet from a wall and pushing off. This reduces the load significantly.
- Intermediate (Elevated Push-Up): Place your hands on an elevated surface like a sturdy table or counter. The higher the surface, the easier the push-up.
- Advanced (Full Push-Up): Once you can comfortably do 10-12 knee push-ups with perfect form, try a full push-up from your toes. Healthline also lists the “Standard Pushup” as an intermediate exercise.
- One-legged Pushup: For the truly advanced, Healthline suggests this unilateral challenge.
Muscles Targeted
- Primary: Pectoralis Major (chest), Anterior Deltoids (front of shoulders), Triceps Brachii (back of arms)
- Secondary: Core (rectus abdominis, obliques) for stabilization
Why We Love It: The Foundation of Upper Body Strength
“I remember struggling with even a single full push-up,” says Emily, our functional fitness expert. “The knee push-up was my gateway. It allowed me to build the necessary strength in my chest, shoulders, and triceps without getting frustrated. It’s not a ‘lesser’ exercise; it’s a smart progression that builds a solid foundation for all upper body pushing movements. Plus, it really teaches you to engage your core, which is vital for everything!”
4. Hollow Hold to Jackknife: Core Control Meets Dynamic Power 🔥
If you’re looking to seriously challenge your core, this dynamic duo is your new best friend. The Hollow Hold builds incredible isometric core strength, while the Jackknife adds a powerful, dynamic crunch that targets your deep abdominal muscles. Healthline lists the “Hollow Hold to Jackknife” as an advanced core exercise, and we agree – it’s a powerhouse!
How to Perform the Hollow Hold to Jackknife (Step-by-step)
- Starting Position (Hollow Hold): Lie on your back with your arms extended overhead and legs straight. Gently press your lower back into the floor, engaging your core so there’s no gap between your back and the mat.
- Lift into Hollow Hold: Lift your head, shoulders, and legs a few inches off the ground. Your body should form a slight “banana” shape. Keep your core tight and maintain that lower back contact with the floor. This is your Hollow Hold.
- Transition to Jackknife: From the Hollow Hold, simultaneously bring your arms and legs towards each other, lifting your upper back and hips off the ground. Your hands should reach towards your feet, forming a “V” shape with your body.
- Exhale and Contract: As you crunch up into the Jackknife, exhale forcefully and really squeeze your abdominal muscles.
- Return to Hollow Hold: Slowly and with control, lower your arms and legs back down to the Hollow Hold position, maintaining that slight “banana” shape and keeping your lower back pressed into the floor.
- Repeat: Perform for the desired number of repetitions.
VPT™ Pro Tip: Control is Everything!
The key here is control, especially on the return to the Hollow Hold. Avoid letting your limbs just drop. The slower and more controlled you are, the more your core has to work. Leaps & Rebounds advises to “keep core engaged; control movement to avoid shaking” and “exhale on jackknife, inhale on return.” This is crucial for maximizing effectiveness and preventing strain.
Variations and Progression
- Beginner (Modified Jackknife): Start with a basic Jackknife from a flat back, without the Hollow Hold transition. Or, perform a single-leg Jackknife, bringing one knee towards your chest at a time.
- Intermediate (Hollow Hold): Master the static Hollow Hold first, holding it for 20-30 seconds before attempting the dynamic Jackknife transition.
- Advanced: The full Hollow Hold to Jackknife is already quite advanced! To increase the challenge further, slow down the tempo even more, or hold the Jackknife position briefly at the top.
Muscles Targeted
- Primary: Rectus Abdominis (your “six-pack” muscles), Obliques, Transverse Abdominis (deep core)
- Secondary: Hip Flexors, Quadriceps (for leg lift)
Why We Love It: The Ultimate Core Challenge
“I used to think crunches were enough for my core,” confesses Alex, our resident Pilates and core specialist. “Then I discovered the Hollow Hold to Jackknife. It’s a brutal but incredibly effective exercise that truly tests your core’s ability to stabilize and generate power. It’s not just about aesthetics; it’s about functional strength that translates to better posture, reduced back pain, and improved performance in almost every other exercise. When clients master this, their confidence (and their abs!) soar!”
5. Tricep Dips: Sculpt Those Arms Using Just a Chair 💪
Want to banish those “bat wings” and sculpt strong, defined triceps? Look no further than Tricep Dips! This fantastic bodyweight exercise primarily targets the triceps, but also engages your chest and shoulders. The best part? All you need is a sturdy chair, bench, or even the edge of your couch. Leaps & Rebounds confirms, “Equipment: sturdy chair or bench.” The first YouTube video also demonstrates dips, noting advanced users can use a chair #featured-video.
How to Perform Tricep Dips (Step-by-step)
- Set Up Your Station: Position yourself in front of a sturdy chair or bench. Place your hands on the edge of the chair, shoulder-width apart, with your fingers pointing forward (or slightly out to the sides, whatever feels comfortable for your wrists).
- Starting Position: Slide your glutes off the edge of the chair, extending your legs out in front of you. Keep your back close to the chair. Your knees can be bent (easier) or legs straight (harder).
- Lower Your Body: Keeping your elbows pointing straight back (avoid letting them flare out to the sides), slowly lower your body by bending your elbows. Descend until your elbows are at about a 90-degree angle, or slightly deeper if comfortable.
- Push Up: Drive through your palms and extend your arms to push yourself back up to the starting position. Focus on squeezing your triceps at the top.
- Repeat: Perform for the desired number of repetitions.
VPT™ Pro Tip: Slow and Controlled!
As Leaps & Rebounds wisely states, “Slow, controlled dips are more effective.” Rushing through this exercise can put unnecessary strain on your shoulders. Focus on the eccentric (lowering) phase, taking 2-3 seconds to descend, and then powerfully pushing back up. Keep your shoulders down and away from your ears throughout the movement.
Variations and Progression
- Beginner (Bent Knees): Keep your knees bent and feet flat on the floor. The closer your feet are to the chair, the easier the exercise.
- Intermediate (Straight Legs): Extend your legs straight out in front of you, heels on the floor. This increases the load on your triceps.
- Advanced (Elevated Feet): For an even greater challenge, elevate your feet on another chair or step. This significantly increases the bodyweight you’re lifting. Leaps & Rebounds also suggests this variation.
Muscles Targeted
- Primary: Triceps Brachii
- Secondary: Anterior Deltoids (front of shoulders), Pectoralis Major (chest)
Why We Love It: Functional Arm Strength
“Tricep dips are a fantastic way to build functional arm strength that translates into everyday activities, from pushing open a heavy door to lifting groceries,” says David, our resident strength coach. “I love how versatile they are – you can do them anywhere you find a sturdy surface. I’ve even done them off park benches! They’re a staple in my own routine and a go-to for clients who want to build impressive arm definition without needing a gym full of weights.”
6. Spider Crawl: The Ultimate Full-Body Mobility and Strength Move 🕷️
Ready to channel your inner superhero? The Spider Crawl is a dynamic, full-body exercise that combines strength, mobility, and coordination in one fluid movement. It’s fantastic for engaging your core, strengthening your shoulders, and improving hip flexibility. Leaps & Rebounds highlights its “full-body engagement; emphasizes core & coordination.”
How to Perform the Spider Crawl (Step-by-step)
- Starting Position: Begin in a high plank position. Your hands should be directly under your shoulders, fingers spread wide, and your body forming a straight line from head to heels. Engage your core tightly.
- Initiate the Crawl: Take a small step forward with your right hand and simultaneously bring your right knee towards your right elbow, outside of your arm.
- Maintain Plank: As you move, keep your hips as stable as possible – avoid letting them sag or rotate excessively. This is a crucial tip from Leaps & Rebounds.
- Alternate Sides: Return your right hand and right foot to the starting plank position.
- Repeat on Other Side: Immediately repeat the movement on the left side: step forward with your left hand and bring your left knee towards your left elbow.
- Continue: Alternate sides, moving forward in a controlled, crawling motion.
VPT™ Pro Tip: Squeeze Those Abs!
Leaps & Rebounds advises to “focus on squeezing abs during knee-to-elbow motion.” This is spot on! The Spider Crawl isn’t just about moving your limbs; it’s about maintaining a rock-solid core throughout. Imagine you have a glass of water on your lower back – try not to spill it!
Variations and Progression
- Beginner (Slow and Controlled): Focus on slow, deliberate movements, ensuring perfect form and hip stability. You can even pause briefly with your knee at your elbow.
- Intermediate: Increase the pace slightly while maintaining control.
- Advanced (Spider-Man Push-Up): Combine the Spider Crawl with a push-up. As you bring your knee to your elbow, perform a push-up. This adds a significant upper body challenge.
Muscles Targeted
- Primary: Core (rectus abdominis, obliques, transverse abdominis), Shoulders (deltoids), Triceps
- Secondary: Quadriceps, Hip Flexors, Glutes (for stability)
Why We Love It: Functional Movement Master
“The Spider Crawl is one of my favorite exercises for athletes and anyone looking to improve their overall functional movement,” says Chloe, our movement specialist. “It mimics natural crawling patterns, which are incredibly beneficial for core strength and cross-body coordination. It’s a fantastic warm-up, a challenging core finisher, or even a full-body workout on its own. Plus, it just feels powerful, like you’re truly mastering your body!”
7. Reverse Crunch: Targeting Lower Abs Like a Pro 🔥
When it comes to core work, many people focus on traditional crunches, but the Reverse Crunch offers a unique advantage: it specifically targets the often-stubborn lower abdominal muscles with less strain on your neck and back. It’s a fantastic way to build a strong, functional core. Leaps & Rebounds notes it “targets lower abs; less strain on neck/back.” The first YouTube video also includes reverse crunches in its beginner workout, emphasizing pulling knees towards the chest while keeping the lower back flat #featured-video.
How to Perform the Reverse Crunch (Step-by-step)
- Starting Position: Lie on your back on a yoga mat with your knees bent and feet flat on the floor. Place your hands by your sides, palms down, or gently under your lower back for extra support.
- Engage Core: Press your lower back into the floor and engage your core.
- Lift Legs: Bring your knees towards your chest until your hips lift slightly off the floor. Your knees should remain bent at roughly a 90-degree angle.
- Contract Abs: Focus on using your lower abdominal muscles to lift your hips, rather than swinging your legs.
- Lower with Control: Slowly lower your legs back down to the starting position, or just before your feet touch the floor, maintaining control throughout the movement. Avoid letting your lower back arch.
- Repeat: Perform for the desired number of repetitions.
VPT™ Pro Tip: Slow and Deliberate!
“Slow and deliberate movements build muscle safely,” is a quote from Leaps & Rebounds that perfectly applies here. The slower you perform the Reverse Crunch, especially the lowering phase, the more effective it will be. Resist the urge to use momentum! Think about “tucking” your pelvis towards your ribs.
Variations and Progression
- Beginner: Perform with a smaller range of motion, focusing on just lifting the hips slightly off the floor.
- Intermediate: Extend your legs further out before bringing them back in, increasing the lever arm and challenge.
- Advanced (Hollow Hold to Jackknife): As mentioned earlier, the Hollow Hold to Jackknife (which incorporates a reverse crunch-like movement) is an advanced progression. You can also try a “Dead Bug” (Healthline) which activates deep core muscles and is scalable.
- Bicycle Crunch: While different, the Bicycle Crunch (also mentioned by Healthline and the first YouTube video) is another excellent lower ab and oblique exercise.
Muscles Targeted
- Primary: Rectus Abdominis (especially the lower fibers), Transverse Abdominis
- Secondary: Obliques, Hip Flexors
Why We Love It: Core Health and Aesthetics
“I’ve seen so many clients struggle with lower back pain because their deep core muscles aren’t strong enough,” shares Dr. Lena, our in-house physical therapist. “The Reverse Crunch is a fantastic, low-impact way to strengthen those crucial muscles. It’s not just about getting a ‘six-pack’; it’s about building a stable, healthy core that supports your spine and improves all your other movements. Plus, the aesthetic benefits are a nice bonus!”
8. Sit-Up: Classic Core Strengthening with a Twist 💪
The Sit-Up is a classic for a reason – it’s a straightforward and effective way to strengthen your rectus abdominis, the muscle responsible for that coveted “six-pack” look. While it sometimes gets a bad rap for neck strain, with proper form and modifications, it remains a valuable part of a comprehensive core routine. Leaps & Rebounds calls it a “classic core exercise; can be modified.”
How to Perform the Sit-Up (Step-by-step)
- Starting Position: Lie on your back on a yoga mat with your knees bent and feet flat on the floor, hip-width apart. You can place your hands behind your head (lightly, without pulling on your neck), across your chest, or extended forward.
- Engage Core: Press your lower back into the floor and engage your abdominal muscles.
- Lift Your Torso: Exhale as you slowly lift your head, then shoulders, then upper back off the floor, curling your torso towards your knees.
- Reach the Top: Continue until your chest is close to your thighs, or as far as you can comfortably go without straining your neck or lower back.
- Lower with Control: Inhale as you slowly reverse the movement, lowering your torso back down to the starting position, vertebra by vertebra.
- Repeat: Perform for the desired number of repetitions.
VPT™ Pro Tip: Protect Your Neck!
A common mistake is pulling on your neck to lift your body. Instead, imagine an apple-sized space between your chin and chest. Leaps & Rebounds advises to “avoid pulling on neck” and “engage abs throughout, pulling belly button inward.” If you struggle with neck strain, try placing your hands across your chest or extending them forward, which reduces the leverage and makes the movement easier.
Variations and Progression
- Beginner (Assisted Sit-Up): Have a partner hold your feet, or hook your feet under a sturdy piece of furniture (like a couch). You can also use a stability ball for support.
- Intermediate: Perform unassisted, focusing on slow, controlled movements.
- Advanced (Weighted Sit-Up): Hold a light dumbbell or weight plate across your chest for added resistance.
- Russian Twist: The first YouTube video includes Russian Twists, which are a great way to target the obliques and can be done with heels on the ground (beginner) or lifted (advanced) #featured-video.
Muscles Targeted
- Primary: Rectus Abdominis, Obliques
- Secondary: Hip Flexors
Why We Love It: The Foundation of Core Strength
“The Sit-Up has been a cornerstone of core training for decades, and for good reason,” says Maria, our fitness historian and trainer. “It’s a straightforward way to build strength in the rectus abdominis. While newer exercises offer different benefits, mastering the basic sit-up with proper form provides a solid foundation. It’s a great benchmark for core endurance and strength, and when done correctly, it’s incredibly effective.”
9. Mountain Climber: Cardio Meets Core in One Explosive Move ⛰️
Get ready to elevate your heart rate and torch your core simultaneously with the Mountain Climber! This dynamic exercise is a fantastic blend of cardiovascular training and core strengthening, making it a staple in many high-intensity interval training (HIIT) routines. Leaps & Rebounds accurately describes it as “cardio & core; increases stamina.” The first YouTube video also features Mountain Climbers, encouraging advanced users to pick up the pace #featured-video.
How to Perform the Mountain Climber (Step-by-step)
- Starting Position: Begin in a high plank position. Your hands should be directly under your shoulders, fingers spread wide, and your body forming a straight line from head to heels. Engage your core tightly.
- Initiate the Movement: Drive one knee towards your chest, keeping your core engaged and hips stable.
- Switch Legs: As you return the first leg to the plank position, immediately drive the other knee towards your chest.
- Maintain Form: Continue alternating legs in a rapid, controlled motion, as if you’re running in place while in a plank.
- Keep Hips Stable: A crucial tip from Leaps & Rebounds is to “keep hips stable; alternate legs quickly.” Avoid letting your hips pike up or sag down. Maintain that straight line from head to heels.
VPT™ Pro Tip: Breathe and Brace!
It’s easy to hold your breath during intense exercises like Mountain Climbers. Remember to breathe rhythmically! Inhale as one leg extends, exhale as the other drives in. Also, actively brace your core throughout – imagine someone is about to punch you in the stomach. This protects your lower back and maximizes core engagement.
Variations and Progression
- Beginner (Slow Climber): Perform the movement slowly, focusing on bringing your knee all the way to your chest with control before switching.
- Intermediate: Increase the pace, aiming for a consistent, moderate speed.
- Advanced (Cross-Body Climber): Drive your knee towards the opposite elbow, adding an oblique twist. Or, as the first YouTube video suggests, simply pick up the pace for a more intense cardio burst.
- Spiderman Climber: Bring your knee to the outside of your elbow, similar to the Spider Crawl, but with a faster pace.
Muscles Targeted
- Primary: Rectus Abdominis, Obliques, Transverse Abdominis (core), Hip Flexors
- Secondary: Shoulders, Triceps (for plank stability), Quadriceps
Why We Love It: The Ultimate Efficiency Move
“Mountain Climbers are one of my go-to exercises when I’m short on time but want a full-body blast,” says Coach Ben, our HIIT specialist. “They hit your cardio, your core, and even your shoulders, all in one dynamic movement. I love throwing them into circuits because they get your heart rate up fast and really challenge your endurance. Plus, there’s something incredibly satisfying about the rhythm of them once you get going!”
10. Pistol Squat: The King of Single-Leg Strength 👑
If you’re looking for an exercise that truly tests your leg strength, balance, and mobility, the Pistol Squat is it. This advanced single-leg squat is a testament to body control and power, and mastering it is a significant fitness achievement. Leaps & Rebounds aptly calls it an “advanced single-leg squat; builds leg strength & balance.”
How to Perform the Pistol Squat (Step-by-step)
- Starting Position: Stand tall with your feet hip-width apart. Shift your weight onto one leg, extending the other leg straight out in front of you. You can extend your arms forward for balance.
- Initiate the Descent: Keeping your chest up and core engaged, slowly begin to lower your body by bending the knee of your standing leg.
- Maintain Balance: As you descend, keep your extended leg off the ground and as straight as possible. Focus on keeping your balance throughout the movement.
- Deep Squat: Lower yourself until your glutes are close to your heel, or as deep as your mobility allows while maintaining good form. Your extended leg should ideally remain parallel to the floor.
- Ascend: Drive through the heel of your standing leg, powerfully pushing yourself back up to the starting position.
- Repeat: Perform for the desired number of repetitions, then switch legs.
VPT™ Pro Tip: Warm-Up and Progress Gradually!
“Warm up hips & ankles; progress gradually,” is excellent advice from Leaps & Rebounds. The Pistol Squat requires significant ankle and hip mobility. Don’t jump straight into it! Spend time on ankle mobility drills (like calf raises and ankle rotations) and hip flexor stretches.
Variations and Progression
- Beginner (Assisted Pistol Squat):
- Holding onto Support: Use a sturdy pole, doorframe, or resistance band for assistance as you lower and raise.
- Box Pistol Squat: Squat down to a box or chair, gradually decreasing the height of the box as you get stronger.
- Counterbalance: Hold a light weight (like a small dumbbell or even a book) out in front of you. This helps counterbalance your weight and makes the squat easier.
- Intermediate (Elevated Pistol Squat): Stand on a slightly elevated surface (like a step) so your non-working leg can hang freely, allowing for a deeper squat without hitting the floor.
- Advanced: The full, unassisted Pistol Squat is the goal! To increase difficulty, slow down the tempo even more or add a pause at the bottom.
Muscles Targeted
- Primary: Quadriceps, Gluteus Maximus, Hamstrings (of the standing leg)
- Secondary: Calves, Core (for balance and stability), Hip Abductors/Adductors
Why We Love It: Unilateral Powerhouse
“The Pistol Squat is one of those ‘wow’ exercises that truly showcases your body’s capabilities,” says Dr. Anya, our biomechanics expert. “It’s not just about strength; it’s about incredible balance, coordination, and mobility. Unilateral exercises like the Pistol Squat are vital for correcting muscle imbalances, improving athletic performance, and preventing injuries. When a client finally nails their first Pistol Squat, the look of accomplishment is priceless!”
11. Burpee: The Full-Body Fat-Burning Beast 😈
Ah, the burpee. It’s the exercise that fitness enthusiasts love to hate, and hate to love! But there’s no denying its power: the burpee is a full-body, high-intensity exercise that combines a squat, plank, push-up, and jump into one explosive movement. It’s a phenomenal calorie burner and a fantastic way to build cardiovascular endurance and muscular strength. Leaps & Rebounds calls it a “full-body & cardio; combines squat, plank, push-up, jump.”
How to Perform the Burpee (Step-by-step)
- Starting Position (Stand): Begin standing tall with your feet shoulder-width apart.
- Squat Down: Hinge at your hips and squat down, placing your hands on the floor directly in front of your feet, shoulder-width apart.
- Jump Back to Plank: In one fluid motion, kick your feet back behind you, landing in a high plank position. Your body should form a straight line from head to heels.
- Push-Up (Optional): From the plank, perform one push-up (chest to the floor, then push back up).
- Jump Feet Forward: Immediately jump your feet back towards your hands, landing in a squat position.
- Jump Up: Explode upwards into a vertical jump, reaching your arms overhead.
- Land Softly: Land softly with bent knees, absorbing the impact, and immediately transition into the next repetition.
- Repeat: Perform for the desired number of repetitions.
VPT™ Pro Tip: Focus on Movement Pattern, Not Perfection!
“Focus on movement pattern, not perfection,” is a great quote from Leaps & Rebounds, especially for burpees. It’s a complex movement, and it’s okay if your first few aren’t perfectly smooth. Focus on linking the movements together. And remember, “a 20-minute home workout is better than no physical activity” (Healthline), so even a few burpees are better than none!
Variations and Progression
- Beginner (Modified Burpee):
- Step Back Instead of Jump: Instead of jumping your feet back to plank, step one foot back, then the other. Then step one foot forward, then the other.
- Skip the Push-Up: Omit the push-up entirely, going straight from plank to jumping feet forward.
- No Jump at the Top: Instead of jumping at the end, simply stand up tall and reach overhead.
- The first YouTube video includes “Walk Down Planks” which is a good precursor to the burpee’s plank transition, where you stand, walk hands out to a plank, then walk hands back to stand #featured-video.
- Intermediate: Perform the full burpee as described above.
- Advanced (Burpee with Tuck Jump or Box Jump): Add a tuck jump at the top, bringing your knees to your chest, or jump onto a low, sturdy box.
Muscles Targeted
- Primary: Quadriceps, Hamstrings, Glutes, Chest, Shoulders, Triceps, Core
- Secondary: Calves, Hip Flexors, pretty much everything!
Why We Love It: The Ultimate Metabolic Booster
“If I had to pick one exercise to do for the rest of my life, it might just be the burpee,” says Coach Sam, our metabolic conditioning guru. “It’s incredibly efficient, hitting every major muscle group and skyrocketing your heart rate in seconds. It’s tough, no doubt, but the results speak for themselves. Burpees are fantastic for fat burning, building endurance, and just feeling like an absolute powerhouse. They’re a true test of grit!”
12. Handstand Wall Walk: Defying Gravity for Upper Body Power 🤸 ♀️
Ready to literally turn your world upside down? The Handstand Wall Walk is an advanced exercise that builds incredible upper body strength, shoulder stability, and core control. It’s a fantastic way to progress towards freestanding handstands and develop a powerful physique. Leaps & Rebounds correctly identifies it as an “upper body & core strength; advanced move.”
How to Perform the Handstand Wall Walk (Step-by-step)
- Starting Position: Begin in a push-up position with your feet close to a wall. Your hands should be shoulder-width apart, fingers spread.
- Walk Feet Up the Wall: One foot at a time, start walking your feet up the wall. As your feet move higher, simultaneously walk your hands closer to the wall.
- Achieve Handstand Position: Continue walking your hands closer to the wall and your feet higher until your body is in a vertical handstand position, with your chest facing the wall. Your hands should be about 6-12 inches from the wall, and your body should be as straight as possible, with your core engaged.
- Hold (Optional): You can hold this handstand position for a few seconds to build isometric strength.
- Walk Down: Slowly and with control, reverse the movement. Walk your hands away from the wall as you walk your feet back down the wall, returning to the starting push-up position.
- Repeat: Perform for the desired number of repetitions.
VPT™ Pro Tip: Safety First!
“Safety: Practice handstands against wall first,” is a crucial piece of advice from Leaps & Rebounds. Before attempting the walk, ensure you’re comfortable kicking up into a static handstand against the wall. Always clear the area around you, and if you’re unsure, have a spotter. Focus on keeping your core tight and your gaze slightly forward between your hands.
Variations and Progression
- Beginner (Static Wall Handstand): Start by simply kicking up into a handstand against the wall and holding it for time. Focus on maintaining a straight body line.
- Intermediate (Partial Wall Walk): Don’t walk all the way into a full vertical handstand. Walk your feet only partway up the wall, then walk back down. Gradually increase the height.
- Advanced: The full Handstand Wall Walk is already very advanced. To increase the challenge further, try holding the top position for longer, or perform Handstand Push-Ups against the wall.
Muscles Targeted
- Primary: Deltoids (shoulders), Triceps Brachii, Trapezius (upper back)
- Secondary: Core (rectus abdominis, obliques, transverse abdominis), Forearms (for grip)
Why We Love It: Unlocking New Levels of Strength
“The Handstand Wall Walk is one of those exercises that truly makes you feel like an athlete,” exclaims Coach Leo, our calisthenics expert. “It’s incredibly empowering to defy gravity and build such immense upper body and core strength. I love guiding clients through the progression – from simply holding a wall handstand to finally walking all the way up. It builds not just physical strength, but also incredible mental fortitude and body awareness. It’s a game-changer for anyone serious about bodyweight mastery.”
13. Standing Long Jump: Explosive Power Training at Home 🚀
Want to unleash your inner athlete and develop explosive power in your lower body? The Standing Long Jump is a fantastic plyometric exercise that requires no equipment and can be done in any open space. It targets your glutes, quads, and hamstrings, helping you generate force quickly. Leaps & Rebounds notes it “targets glutes, quads, hamstrings.”
How to Perform the Standing Long Jump (Step-by-step)
- Starting Position: Stand with your feet hip-width apart, toes pointing forward. Find a clear, open space with enough room to jump forward and land safely.
- Prepare to Jump: Bend your knees slightly, hinge at your hips, and swing your arms back behind you. This is your “load” phase, where you’ll generate momentum.
- Explode Forward: In one powerful, fluid motion, swing your arms forward and up, simultaneously pushing off the ground with both feet. Drive your hips forward and jump as far forward as you can.
- Land Softly: Land softly on both feet, absorbing the impact by bending your knees and hips. Your landing should be controlled, like a deep squat, to protect your joints.
- Stabilize: Hold your landing position for a moment to ensure you’ve maintained balance.
- Reset: Stand up, walk back to your starting point, and prepare for the next jump.
- Repeat: Perform for the desired number of repetitions.
VPT™ Pro Tip: Focus on Forward Momentum, Soft Landings!
“Focus on forward momentum, soft landings,” is excellent advice from Leaps & Rebounds. The power comes from your hips and glutes, not just your knees. Think about projecting your body forward, not just up. And always prioritize a soft, controlled landing to prevent injury.
Variations and Progression
- Beginner (Broad Jump to Stand): Focus on the jump and landing. Instead of immediately resetting, stand up tall after landing.
- Intermediate: Perform the full Standing Long Jump, focusing on maximizing distance while maintaining a soft landing. Leaps & Rebounds suggests “Perform 8-10 jumps per set, rest 30 sec.”
- Advanced (Continuous Long Jumps): Immediately transition from your landing into the next jump, minimizing rest between jumps. This adds a significant cardiovascular and endurance challenge.
- Jumping Lunges: Healthline lists “Jumping Lunges” as an advanced plyometric exercise, which also builds explosive power.
Muscles Targeted
- Primary: Gluteus Maximus, Quadriceps, Hamstrings, Calves
- Secondary: Core (for stability during jump and landing)
Why We Love It: Unlocking Explosive Power
“The Standing Long Jump is one of my favorite ways to assess and train explosive power,” says Coach Ryan, our sports performance specialist. “It’s a primal movement that translates directly to athletic performance – think sprinting, jumping for a rebound, or quickly changing direction. It’s incredibly empowering to see clients improve their jump distance, knowing they’re building real, functional power that makes them feel stronger and more agile in everyday life.”
14. Side Plank: Core Stability and Oblique Strength 💪
While the traditional plank is excellent for your rectus abdominis, the Side Plank is your secret weapon for targeting the often-neglected oblique muscles and building incredible core stability. It’s fantastic for improving posture, preventing lower back pain, and strengthening the muscles that support rotational movements. Leaps & Rebounds highlights its benefits for “oblique & core strength; improves stability.”
How to Perform the Side Plank (Step-by-step)
- Starting Position: Lie on your side on a yoga mat, with your body in a straight line. Prop yourself up on your forearm, ensuring your elbow is directly under your shoulder. Stack your feet one on top of the other.
- Engage Core: Brace your core and lift your hips off the floor, so your body forms a straight line from your head to your heels.
- Hold: Maintain this straight line, keeping your hips from sagging or piking up. Your top arm can be placed on your hip or extended towards the ceiling.
- Breathe: Remember to breathe deeply and consistently throughout the hold.
- Lower with Control: Slowly lower your hips back down to the starting position.
- Repeat: Perform for the desired duration, then switch to the other side.
VPT™ Pro Tip: Keep Body in a Straight Line!
“Keep body in a straight line; switch sides,” is a key tip from Leaps & Rebounds. A common mistake is letting the hips sag towards the floor. Actively push through your forearm and engage your obliques to keep your body rigid and straight. Imagine a string pulling you up from your top hip.
Variations and Progression
- Beginner (Kneeling Side Plank): Bend your knees and support yourself on your forearm and knees, keeping your body in a straight line from head to knees. Healthline also suggests a “Kneeling Side Plank with Hip Abduction” for combined core and hip strength.
- Intermediate: Perform the standard Side Plank, holding for 20-30 seconds initially, as Leaps & Rebounds recommends. Gradually increase the hold time.
- Advanced (Side Plank with Leg Lift): While holding the side plank, lift your top leg a few inches towards the ceiling. This adds an extra challenge for your obliques and hip abductors. Healthline lists “Side Plank with Hip Abduction” as an advanced full-body challenge.
- Side Plank with Rotation: From the side plank, reach your top arm under your body, rotating your torso, then return to the starting position.
Muscles Targeted
- Primary: Obliques (internal and external), Transverse Abdominis, Gluteus Medius (for hip stability)
- Secondary: Shoulders (deltoids), Quadratus Lumborum (lower back stabilizer)
Why We Love It: The Unsung Hero of Core Strength
“The Side Plank is often overlooked, but it’s an absolute powerhouse for core health,” says Dr. Anya. “It directly strengthens the muscles that stabilize your spine and pelvis, which is crucial for preventing lower back pain and improving performance in almost every other exercise. I’ve seen clients dramatically improve their posture and reduce discomfort simply by consistently incorporating side planks into their routine. It’s the unsung hero of core strength!”
15. Marching In Place: Low-Impact Cardio for Every Fitness Level 🚶 ♀️
Sometimes, the simplest exercises are the most effective. Marching In Place might seem basic, but it’s a fantastic low-impact cardiovascular exercise that can be done anywhere, anytime. It’s perfect for warming up, cooling down, or as a standalone cardio session, especially for beginners or those recovering from injury. Leaps & Rebounds notes it’s “low-impact cardio; warms up or standalone.” The first YouTube video also includes “High Knees” which is an advanced form of marching in place, encouraging users to go faster #featured-video.
How to Perform Marching In Place (Step-by-step)
- Starting Position: Stand tall with your feet hip-width apart, arms relaxed by your sides.
- Lift One Knee: Lift one knee towards your chest, bringing your thigh parallel to the floor (or as high as comfortable).
- Arm Movement: Simultaneously, swing the opposite arm forward, as if you’re marching.
- Lower and Switch: Lower your foot back to the ground with control, and immediately switch to the other leg and arm.
- Maintain Posture: Keep your chest up, shoulders back, and core gently engaged throughout the movement.
- Continue: Maintain a steady, rhythmic pace.
VPT™ Pro Tip: Adjust Difficulty!
“Adjust difficulty; can be done anywhere,” is a great quote from Leaps & Rebounds. To increase the intensity, simply increase your pace, lift your knees higher, or add a slight hop between steps. To decrease it, slow down and focus on controlled movements.
Variations and Progression
- Beginner: Focus on a slow, controlled march, ensuring good posture and arm swing.
- Intermediate: Increase your pace and knee height.
- Advanced (High Knees): Drive your knees up as high and as fast as you can, almost like running in place. This is a fantastic high-intensity cardio burst, as demonstrated in the first YouTube video #featured-video.
- Marching with Arm Circles: Add arm circles (forward or backward) to incorporate upper body movement and warm up your shoulders.
Muscles Targeted
- Primary: Quadriceps, Hamstrings, Glutes, Calves
- Secondary: Core (for stability), Shoulders (with arm swing)
Why We Love It: Accessible Cardio for All
“Marching in place is often underestimated, but it’s a truly inclusive exercise,” says Dr. Lena. “It’s perfect for anyone, regardless of age or fitness level, to get their heart rate up safely. I often recommend it to clients who are just starting their fitness journey or those who need a gentle way to stay active. It proves that you don’t need to run a marathon to get cardiovascular benefits – sometimes, just moving your body consistently is enough!”
16. Single Leg Stand: Balance and Coordination Made Simple 🧘
Balance is a fundamental aspect of fitness that often gets overlooked, yet it’s crucial for preventing falls, improving athletic performance, and maintaining functional independence as we age. The Single Leg Stand is a deceptively simple exercise that dramatically improves your balance and ankle stability. Leaps & Rebounds notes its benefits for “balance & ankle stability.”
How to Perform the Single Leg Stand (Step-by-step)
- Starting Position: Stand tall with your feet hip-width apart, arms relaxed by your sides. Find a focal point in front of you to help with stability.
- Lift One Leg: Gently shift your weight onto one foot. Slowly lift the other foot off the ground, bending your knee slightly. You can keep the lifted foot close to the standing leg or extend it slightly forward or to the side.
- Hold: Maintain your balance, keeping your standing leg slightly bent (not locked out) and your core gently engaged. Try to keep your hips level.
- Breathe: Breathe naturally throughout the hold.
- Lower and Switch: Slowly lower your lifted foot back to the ground and switch to the other leg.
- Repeat: Perform for the desired duration on each leg.
VPT™ Pro Tip: Close Your Eyes for Added Difficulty!
“Close eyes for added difficulty,” is a fantastic tip from Leaps & Rebounds. Removing visual cues forces your proprioceptive system (your body’s sense of position) to work harder, significantly challenging your balance. Start by holding for 15-30 seconds, as suggested by Leaps & Rebounds, and gradually increase.
Variations and Progression
- Beginner (Assisted Stand): Stand near a wall or sturdy chair and lightly touch it with one finger for support if needed. Gradually reduce your reliance on the support.
- Intermediate: Perform the standard Single Leg Stand without support. Try holding for longer durations (e.g., 30-60 seconds).
- Advanced:
- Close Your Eyes: As mentioned, this is a significant progression.
- Dynamic Arm Movements: While standing on one leg, perform arm circles or reach your arms in different directions.
- Single Leg Squat (Pistol Squat Prep): While standing on one leg, perform a small, controlled squat on that leg. This is a great precursor to the Pistol Squat.
Muscles Targeted
- Primary: Ankle Stabilizers (peroneals, tibialis anterior), Gluteus Medius (for hip stability), Core (for overall balance)
- Secondary: Quadriceps, Hamstrings (of the standing leg)
Why We Love It: The Foundation of Agility
“Balance is often the first thing to decline as we age, but it’s also one of the easiest to maintain and improve with consistent practice,” says Emily. “The Single Leg Stand is so simple, yet so powerful. I’ve seen clients dramatically improve their stability, reduce their risk of falls, and even feel more confident in their movements just by incorporating this into their daily routine. It’s a fundamental exercise for anyone looking to maintain agility and independence.”
17. Hip Abduction: Strengthen Your Hips and Prevent Injuries 🦵
Strong hip abductors (the muscles on the outside of your hips) are crucial for hip stability, knee health, and overall lower body function. They play a vital role in walking, running, and preventing common injuries like IT band syndrome and runner’s knee. The Hip Abduction exercise is a simple yet effective way to target these important muscles. Leaps & Rebounds states it’s “key for posture & injury prevention.”
How to Perform Hip Abduction (Side-Lying Position) (Step-by-step)
- Starting Position: Lie on your side on a yoga mat, with your body in a straight line. You can support your head with your bottom arm or rest it on a pillow. Stack your legs one on top of the other, keeping them straight.
- Engage Core: Gently brace your core to stabilize your torso and prevent rocking.
- Lift Top Leg: Keeping your top leg straight and your foot flexed (toes pointing forward, not up), slowly lift your top leg towards the ceiling. Only go as high as you can without tilting your pelvis or arching your lower back.
- Hold Briefly: Pause for a second at the top, feeling the contraction in your outer hip.
- Lower with Control: Slowly lower your leg back down to the starting position, maintaining control. Don’t just let it drop.
- Repeat: Perform for the desired number of repetitions, then switch to the other side.
VPT™ Pro Tip: Focus on the Outer Hip!
A common mistake is to rotate the leg outwards or use momentum. Focus on keeping your hips stacked and your toes pointing forward. Imagine you’re sliding your leg up a wall. Leaps & Rebounds suggests performing it “in side-lying or side plank position,” which is excellent advice.
Variations and Progression
- Beginner: Perform the side-lying hip abduction with a smaller range of motion.
- Intermediate:
- Resistance Band: Place a resistance band around your ankles or just above your knees for added challenge.
- Side Plank with Hip Abduction: As mentioned by Healthline, combine the side plank with a leg lift for a more advanced, full-body challenge.
- Advanced:
- Standing Hip Abduction: Stand tall and lift one leg out to the side, maintaining balance. This adds a balance component.
- Cable Machine (at gym): If you ever venture to a gym, a cable machine can provide consistent resistance for standing hip abductions.
Muscles Targeted
- Primary: Gluteus Medius, Gluteus Minimus, Tensor Fasciae Latae (TFL)
- Secondary: Core (for stability)
Why We Love It: Injury Prevention Powerhouse
“As a physical therapist, I can’t stress enough the importance of strong hip abductors,” says Dr. Lena. “They are absolutely critical for knee stability and preventing issues like runner’s knee, IT band syndrome, and even lower back pain. Many people have weak hip abductors due to prolonged sitting, and this simple exercise can make a world of difference. It’s truly a powerhouse for injury prevention and overall lower body health.”
18. Yoga Poses: Flexibility, Strength, and Mindfulness at Home 🧘 ♀️
Yoga is more than just stretching; it’s a holistic practice that integrates physical postures (asanas), breathing techniques (pranayama), and meditation to improve flexibility, strength, balance, and mental well-being. It’s perfectly suited for at-home practice, requiring minimal space and often just a yoga mat. Leaps & Rebounds notes its benefits for “flexibility, balance, strength.”
The Benefits of Bringing Yoga Home
- Stress Reduction: The mindful movement and breathwork in yoga are incredibly effective at calming the nervous system and reducing stress.
- Improved Sleep: Regular practice can significantly improve sleep quality. And we all know how much better everything feels after a good night’s rest!
- Enhanced Self-Esteem: Achieving fitness goals, no matter how small, builds confidence and a sense of accomplishment. This positive feedback loop can greatly boost your self-esteem and body image.
- Cognitive Benefits: Studies show that exercise can improve memory, focus, and overall cognitive function source: Harvard Health.
- Mind-Body Connection: Yoga encourages you to be present, fostering a deeper connection between your physical sensations and mental state.
Essential Yoga Poses for Your At-Home Practice
Here are some foundational poses, many of which are highlighted by Leaps & Rebounds, that you can easily incorporate into your routine:
- Downward-Facing Dog (Adho Mukha Svanasana):
- How to: Start on hands and knees. Lift hips towards the ceiling, forming an inverted V-shape. Press palms and heels towards the mat.
- Benefits: Stretches hamstrings, calves, and lengthens the spine. Strengthens arms and legs.
- Warrior II (Virabhadrasana II):
- How to: Step one foot back, turn it parallel to the short edge of the mat. Bend front knee to 90 degrees, keeping it over the ankle. Extend arms out to the sides, gaze over front hand.
- Benefits: Strengthens legs and core, opens hips and chest, builds stamina.
- Plank Pose (Phalakasana):
- How to: From hands and knees, extend legs back, forming a straight line from head to heels. Engage core, press through hands.
- Benefits: Full-body strength, especially core, shoulders, and arms. (Also seen in the first YouTube video as a modified/full plank #featured-video).
- Cobra Pose (Bhujangasana):
- How to: Lie face down, hands under shoulders. Press tops of feet into mat. Inhale, lift chest off floor, keeping elbows close to body.
- Benefits: Strengthens spine, stretches chest and abdomen, improves posture.
- Tree Pose (Vrksasana):
- How to: Stand tall. Shift weight to one foot. Place sole of other foot on inner thigh, calf, or ankle (avoiding knee). Bring hands to prayer at chest or overhead.
- Benefits: Improves balance, strengthens ankles and legs, calms the mind.
- Child’s Pose (Balasana):
- How to: Kneel, sit on heels. Fold forward, resting torso on thighs, forehead on mat. Arms can be extended forward or back by feet.
- Benefits: Gentle stretch for hips, thighs, and ankles. Calms the brain and helps relieve stress and fatigue. Perfect for a cool-down.
VPT™ Pro Tip: Focus on Breath & Mindful Movement!
“Focus on breath & mindful movement,” is the golden rule for yoga, as Leaps & Rebounds reminds us. Don’t just go through the motions. Connect your breath to each movement, allowing it to guide you deeper into poses. This mindful approach is what truly sets yoga apart and maximizes its benefits.
Essential Equipment: Your Yoga Mat
While you can technically do yoga on any soft surface, a good yoga mat provides cushioning, grip, and defines your personal practice space.
👉 Shop Yoga Mats on:
- Manduka PRO Yoga Mat: Amazon | Manduka Official Website
- Liforme Yoga Mat: Amazon | Liforme Official Website
- Gaiam Premium Yoga Mat: Amazon | Gaiam Official Website
19. Strength Training Without Equipment: Bodyweight and Household Items 💪
Think you need a gym full of weights to build muscle? Think again! Bodyweight strength training is incredibly effective for building muscle mass, improving endurance, and boosting overall fitness. As Nerd Fitness confidently states, “Bodyweight exercises can build muscle with proper progression.” And the best part? Your home is already packed with “equipment” you can use!
The Power of Bodyweight Training
Bodyweight exercises use your own mass as resistance. This means they’re inherently functional, training your body to move efficiently and powerfully in real-world situations. They also improve body awareness, coordination, and stability.
Key Principles for Bodyweight Muscle Building:
- Progressive Overload: This is the secret sauce! As Nerd Fitness explains, “You want to know: Can you build muscle mass with bodyweight exercises? Yes! As long as you do what’s called ‘progressive overload.'” This means continually challenging your muscles by:
- Increasing Reps/Sets: Doing more repetitions or more rounds of exercises.
- Reducing Rest Times: Shortening the breaks between sets.
- Slower Movements (Time Under Tension): Taking longer to perform each rep (e.g., 3 seconds down, 3 seconds up).
- Harder Variations: Moving from knee push-ups to full push-ups, or from chair squats to pistol squats.
- Unilateral Training: Focusing on one limb at a time (e.g., single-leg squats, single-arm push-ups) to increase the load on that limb.
- Consistency: Showing up regularly is more important than one super-intense session.
- Proper Form: Always prioritize technique to prevent injury and ensure the target muscles are working effectively.
Bodyweight Exercise Progression Examples
| Exercise Type | Beginner Variation | Intermediate Variation | Advanced Variation |
|---|---|---|---|
| Pushing (Chest/Triceps) | Wall Push-Up | Knee Push-Up | Full Push-Up |
| Pulling (Back/Biceps) | Inverted Row (under table) | Towel Row (door frame) | Chin-Up (if bar available) |
| Squatting (Legs/Glutes) | Chair Squat | Bodyweight Squat | Pistol Squat |
| Lunging (Legs/Glutes) | Supported Lunge | Forward/Reverse Lunge | Jumping Lunge |
| Core (Abs/Back) | Forearm Plank (on knees) | Forearm Plank (full) | Plank with Alternating Leg Lift |
Leveraging Household Items for Added Resistance
Don’t have dumbbells? No problem! Your home is full of potential weights and resistance tools:
- Milk Jugs/Water Bottles: Fill them with water or sand for makeshift dumbbells. Nerd Fitness specifically mentions using a “milk jug or similar” for dumbbell rows.
- Use for: Bicep curls, overhead presses, lateral raises, goblet squats, single-arm rows.
- Backpack: Load a backpack with books, canned goods, or water bottles for added weight during squats, lunges, or push-ups.
- Towel: Use a towel for “towel rows” by wrapping it around a sturdy pole or door handle and pulling. You can also use it for hamstring curls by placing your heels on it on a slippery floor.
- Sturdy Chair/Bench: Essential for tricep dips, elevated push-ups, step-ups, and box squats.
- Resistance Bands: While technically “equipment,” they’re inexpensive, portable, and incredibly versatile for adding resistance to almost any bodyweight exercise (squats, glute bridges, hip abductions, bicep curls, shoulder presses).
👉 Shop Resistance Bands on:
- TheraBand Resistance Bands Set: Amazon | TheraBand Official Website
- Fit Simplify Resistance Loop Bands: Amazon
- Serious Steel Fitness Resistance Bands: Amazon | Serious Steel Official Website
VPT™ Pro Tip: Get Creative!
“We’ve seen clients get incredibly creative with their home setups,” says Coach Ben. “One client used a sturdy kitchen counter for inverted rows, another used heavy laundry detergent bottles for bicep curls. The key is to be safe, ensure your ‘equipment’ is stable, and focus on the muscle contraction. Your body doesn’t know if it’s lifting a fancy dumbbell or a jug of water – it just knows resistance!”
For more detailed guides on bodyweight movements, explore our Exercise Demonstrations and Home-based Workouts categories.
20. Cardiovascular Exercises You Can Do in Your Living Room 🏃 ♀️💨
Who needs a treadmill when you have a living room? Cardiovascular exercise, or cardio, is vital for heart health, endurance, and calorie burning. It gets your heart rate up, improves lung capacity, and can be incredibly fun! The good news is, you can get a fantastic cardio workout right at home with zero equipment. Leaps & Rebounds emphasizes that cardio “elevates heart rate; improves endurance.”
The Benefits of At-Home Cardio
- Heart Health: Strengthens your heart and improves blood circulation.
- Endurance: Increases your stamina for daily activities and other workouts.
- Weight Management: Burns calories and contributes to fat loss.
- Mood Booster: Releases endorphins, reducing stress and improving mood.
- Convenience: No travel time, no gym fees, just pure sweat!
Your At-Home Cardio Arsenal
Here are some dynamic, heart-pumping exercises you can do in your living room:
- Jumping Jacks:
- How to: Start standing with feet together, arms at sides. Jump feet out wide while swinging arms overhead. Jump feet back together, bringing arms back down.
- VPT™ Tip: Keep it light on your feet. For a lower-impact version, step one foot out at a time, swinging arms. The first YouTube video calls this a “Quiet Jack” for beginners, with the full jumping jack for advanced users #featured-video.
- High Knees:
- How to: March or run in place, driving your knees up towards your chest as high and as fast as you can. Pump your arms vigorously.
- VPT™ Tip: Focus on quick feet and a strong core. The first YouTube video demonstrates this, encouraging advanced users to go faster #featured-video.
- Butt Kicks:
- How to: Run in place, focusing on kicking your heels back towards your glutes with each step. Keep your chest up and pump your arms.
- VPT™ Tip: This is great for warming up the hamstrings.
- Imaginary Jump Rope:
- How to: Mimic the motion of jumping rope without the rope. Lightly bounce on the balls of your feet, rotating your wrists as if turning a rope.
- VPT™ Tip: Vary your jumps – two feet, one foot, alternating feet, high knees, criss-cross.
- Mountain Climbers:
- How to: (See detailed description in section 9). From a plank, alternate driving knees to chest.
- VPT™ Tip: Keep your hips stable and core tight. The first YouTube video features these, suggesting picking up the pace for advanced users #featured-video.
- Burpees:
- How to: (See detailed description in section 11). The ultimate full-body cardio and strength combo.
- VPT™ Tip: Use modifications if needed to maintain intensity and form.
- Squat Jumps:
- How to: Perform a regular squat, then explode upwards into a jump, landing softly back into a squat.
- VPT™ Tip: Ensure soft landings to protect your knees. The first YouTube video suggests jump squats for advanced users #featured-video.
- Alternating Reverse Lunges (with pace):
- How to: Step one leg back, drop the knee, then push off to return to standing, immediately switching legs. Increase the pace for cardio.
- VPT™ Tip: The first YouTube video includes these, noting advanced users can do alternating jump lunges #featured-video.
- Overhead Claps:
- How to: Stand with arms out to the sides, then quickly bring them together overhead to clap. Repeat rapidly.
- VPT™ Tip: This is a simple, low-impact way to get the upper body moving and heart rate up, as seen in the first YouTube video #featured-video.
- Alternate Side Steps (from squat):
- How to: From a low squat position, step right, then left, maintaining a low squat throughout.
- VPT™ Tip: The first YouTube video demonstrates this, suggesting speeding it up for advanced users #featured-video.
Crafting Your Cardio Circuit
Leaps & Rebounds suggests performing cardio exercises “in circuits; aim for 30 sec per exercise, increase over time.” We agree! Here’s a sample circuit:
Sample At-Home Cardio Circuit
| Exercise | Duration (Beginner) | Duration (Intermediate) | Duration (Advanced) | Rest Between Exercises |
|---|---|---|---|---|
| Jumping Jacks | 30 seconds | 45 seconds | 60 seconds | 10 seconds |
| High Knees | 30 seconds | 45 seconds | 60 seconds | 10 seconds |
| Butt Kicks | 30 seconds | 45 seconds | 60 seconds | 10 seconds |
| Mountain Climbers | 30 seconds | 45 seconds | 60 seconds | 10 seconds |
| Squat Jumps (or Squats) | 30 seconds | 45 seconds | 60 seconds | 10 seconds |
| Rest between rounds: | 60-90 seconds | 45-60 seconds | 30-45 seconds | |
| Rounds: | 2-3 | 3-4 | 4-5 |
VPT™ Pro Tip: The Talk Test!
“Work at a level where talking is possible but challenging,” is a fantastic guideline from Leaps & Rebounds. This ensures you’re working hard enough to get cardiovascular benefits without overdoing it. If you can sing, you need to work harder. If you can’t speak at all, ease up a bit!
For more dynamic cardio ideas, check out our Exercise Demonstrations and Home-based Workouts sections.
🏋️ ♂️ Crafting Your Perfect At-Home Workout Routine: Tips and Tricks
Now that you’ve got a fantastic arsenal of exercises, how do you put them all together into a routine that works for you? This is where the art of program design comes in, and our Virtual Personal Trainer™ team is here to guide you. Remember, the goal is to create a sustainable, effective routine that keeps you engaged and progressing.
1. Determine Your Frequency and Duration
- How Often? Nerd Fitness recommends performing a bodyweight routine “2-4 times weekly, while taking 48 hours off between workouts.” This allows for muscle recovery and growth. We generally suggest aiming for 3-5 days a week for overall fitness.
- How Long? Even a short, focused workout is incredibly beneficial. Healthline reminds us, “A 20-minute home workout is better than no physical activity.” The first YouTube video’s workout is a perfect example of a comprehensive 20-minute session #featured-video. Start with 20-30 minutes and gradually increase as your stamina improves.
2. Structure Your Workout: Warm-Up, Main Set, Cool-Down
A well-rounded workout always includes these three phases:
- Warm-Up (5-10 minutes):
- Purpose: Prepares your body for exercise, increases blood flow to muscles, and improves joint mobility.
- Examples: Light cardio like marching in place, arm circles, leg swings, torso twists, dynamic stretches. The first YouTube video starts with “Quiet Jacks” and other dynamic moves as a warm-up #featured-video. Nerd Fitness suggests “jogging, marching, jump rope, arm swings.”
- Main Workout (20-45 minutes):
- Purpose: The core of your session, focusing on strength, cardio, or a combination.
- Structure Options:
- Circuit Training: Perform a series of exercises back-to-back with minimal rest between them, then rest after completing the entire circuit. Repeat 2-5 rounds. This is a great way to combine strength and cardio, as seen in our cardio circuit table above. The first YouTube video uses supersets (performing two exercises back-to-back) with 30 seconds of “active rest” between them #featured-video.
- Supersets: Pair two exercises that work opposing muscle groups (e.g., push-ups and glute bridges) or the same muscle group (for extra intensity).
- Straight Sets: Perform all sets of one exercise before moving to the next.
- Cool-Down (5-10 minutes):
- Purpose: Gradually brings your heart rate down, improves flexibility, and aids muscle recovery.
- Examples: Static stretches (holding each stretch for 20-30 seconds), gentle yoga poses (like Child’s Pose), foam rolling. The first YouTube video concludes with overhead stretches, forward folds, quad stretches, and a chest opener #featured-video.
3. Embrace Progressive Overload
This is non-negotiable for continued progress! As Nerd Fitness emphasizes, “After 4-6 weeks, aim to improve reps or exercise difficulty.”
- How to Apply It:
- Increase Reps/Sets: If you can do 10 push-ups easily, try for 12, or add another set.
- Reduce Rest: Shorten your rest periods between sets or circuits.
- Increase Time Under Tension: Slow down the movement. For example, take 3 seconds to lower into a squat, pause for 1 second, then 2 seconds to stand up.
- Advance the Exercise: Move from a knee push-up to an elevated push-up, then to a full push-up.
- Add Resistance: Incorporate resistance bands or household items (as discussed in section 19).
4. Listen to Your Body and Prioritize Form
“It’s better to stop and take a break than to do an exercise incorrectly,” is a crucial reminder from Nerd Fitness. Your body will tell you what it needs.
- Pain vs. Discomfort: Muscle fatigue is normal; sharp, shooting, or persistent pain is not.
- Modify When Needed: Don’t be afraid to use beginner variations or take extra rest.
- Focus on Core Engagement: For almost every exercise, keeping your core tight protects your spine and enhances effectiveness. The first YouTube video frequently reminds viewers to “Keep your core nice and tight. Keep that belly button sucked in” #featured-video.
5. Incorporate Variety
Don’t get stuck in a rut! Mix up your exercises, try new combinations, or explore different types of workouts (e.g., a strength day, a cardio day, a yoga/mobility day). This keeps things fresh and ensures you’re challenging your body in different ways.
VPT™ Pro Tip: Plan Your Week!
“We encourage our clients to schedule their workouts like any other important appointment,” says Sarah. “Look at your week ahead and pencil in your workout times. This simple act of planning dramatically increases adherence. Even if it’s just 20 minutes, commit to it. And remember, our AI-powered virtual coach can help you build and adapt these routines seamlessly!”
For more in-depth guidance on structuring your workouts, check out our Fitness Guides.
🧘 ♀️ Mind-Body Connection: The Role of Mental Health in Home Fitness
It’s easy to focus solely on the physical benefits of exercise – stronger muscles, a leaner physique, improved endurance. But here at Virtual Personal Trainer™, we know that true fitness is holistic. The profound connection between your mind and body is undeniable, and at-home fitness offers a unique opportunity to nurture both.
Exercise: Your Natural Mood Booster
- Stress Reduction: Physical activity is a powerful stress reliever. When you exercise, your body releases endorphins, natural mood elevators that can help reduce feelings of stress and anxiety. A good sweat session can be a fantastic way to clear your head after a long day.
- Improved Sleep: Regular exercise can significantly improve sleep quality. And we all know how much better everything feels after a good night’s rest!
- Enhanced Self-Esteem: Achieving fitness goals, no matter how small, builds confidence and a sense of accomplishment. This positive feedback loop can greatly boost your self-esteem and body image.
- Cognitive Benefits: Studies show that exercise can improve memory, focus, and overall cognitive function source: Harvard Health.
- Mindfulness: Practices like yoga, as discussed in section 18, explicitly cultivate mindfulness, helping you stay present and reduce rumination. Even during intense cardio, focusing on your breath and body sensations can be a form of moving meditation.
The Unique Mental Benefits of Home Workouts
Working out at home offers specific mental advantages:
- Reduced Social Anxiety: For some, the gym environment can be intimidating. Home workouts eliminate this pressure, allowing you to focus purely on your movement without feeling judged.
- Comfort and Control: Being in your own space provides a sense of comfort and control. You can choose your music, your attire, and your pace without external distractions.
- Flexibility: The ability to fit a workout into any pocket of your day, without commuting, reduces mental barriers and stress associated with scheduling.
- Sense of Accomplishment: Consistently showing up for yourself, even when life is chaotic, builds incredible mental resilience and self-discipline.
VPT™ Pro Tip: Make it a Ritual!
“We encourage clients to view their home workout as a sacred ritual, a time just for them,” says Chloe. “It’s not just about burning calories; it’s about carving out space for self-care. Light a candle, put on your favorite music, or even just take a few deep breaths before you start. Treat it as an investment in your mental well-being, not just your physical health.”
Remember, your mental health is just as important as your physical health. If you’re struggling, exercise can be a powerful tool, but it’s also important to seek professional help if needed. For more insights on how lifestyle impacts your well-being, check out our Diet and Nutrition section, as nutrition plays a huge role in mental clarity and mood.
💡 Equipment Essentials for Home Workouts: What You Really Need
One of the biggest myths about working out is that you need a garage full of expensive gear. While fancy equipment can be fun, it’s absolutely not necessary for an effective at-home workout. As we’ve seen, your bodyweight is a powerful tool! However, a few key items can enhance your experience, add variety, and help you progress.
Here’s our Virtual Personal Trainer™ breakdown of what’s truly essential, what’s nice to have, and what you can probably skip for now:
Home Workout Essentials: The Must-Haves (Minimalist Approach)
| Item | Why You Need It
⚡️ Quick Tips and Facts for At-Home Workouts
Welcome to Virtual Personal Trainer™! We know life gets busy, and hitting the gym isn’t always feasible. But guess what? Your living room, backyard, or even a small corner of your apartment can transform into your personal fitness studio! We’re here to prove that you don’t need fancy equipment or a hefty membership to achieve incredible results. In fact, many of the most effective exercises require nothing more than your own bodyweight and a dash of determination.
Before we dive into the nitty-gritty, here are some quick facts and expert tips to kickstart your at-home fitness journey:
- No Gym, No Problem! ✅ You can build significant strength, improve cardiovascular health, and boost flexibility using just your bodyweight. As the experts at Leaps & Rebounds put it, “No gym needed: Achieve full-body fitness using just body weight; equipment isn’t always necessary.”
- Consistency is King (or Queen)! 👑 Aim for 3-5 days of exercise per week. Even a quick 20-minute session is far better than none. The CDC recommends at least 150 minutes of moderate-intensity or 75 minutes of vigorous-intensity aerobic activity per week, plus muscle-strengthening activities on 2 or more days a week source: CDC.
- Form Over Speed! 🐢 Always prioritize proper technique to prevent injuries and maximize effectiveness. As Nerd Fitness wisely advises, “It’s better to stop and take a break than to do an exercise incorrectly.”
- Variety is the Spice of Life (and Fitness)! 🌶️ Combine strength, cardio, and flexibility exercises for a well-rounded routine. This not only keeps things interesting but also targets different muscle groups and energy systems.
- Warm-Up & Cool-Down are Non-Negotiable! 🔥 Don’t skip these crucial steps! A proper warm-up prepares your body, and a cool-down aids recovery. We’ll cover some great options later.
- Listen to Your Body! 👂 Pay attention to how you feel. If something hurts (beyond muscle fatigue), stop and reassess. Progression should be gradual.
- Nutrition Matters! 🍎 Remember, exercise and diet go hand-in-hand. As Nerd Fitness highlights, “You want to know: Can you build muscle mass with bodyweight exercises? Yes! As long as you do what’s called ‘progressive overload.'” But they also emphasize that “80% diet, 10-20% training” is key for weight loss.
Ready to transform your home into a powerhouse of health? Let’s explore the incredible world of at-home exercises! For a broader understanding of exercise types, check out our article on 7 Must-Know Types of Exercises for Total Fitness in 2026 💪.
🏠 The Evolution of At-Home Exercise: From Jane Fonda to Virtual Trainers
Remember the days of VHS tapes and leg warmers? Back in the 80s, icons like Jane Fonda brought fitness right into our living rooms, making at-home workouts a cultural phenomenon. Fast forward a few decades, and while the leg warmers might be gone (mostly!), the spirit of home fitness is stronger than ever.
The journey from bulky VCRs to sleek streaming apps and AI-powered virtual coaches has been nothing short of revolutionary. We’ve seen the rise of fitness DVDs, then YouTube gurus, and now, sophisticated platforms like Virtual Personal Trainer™ that bring personalized guidance directly to you. This evolution isn’t just about convenience; it’s about accessibility, personalization, and making fitness achievable for everyone, regardless of their schedule or location.
Our team at Virtual Personal Trainer™ has witnessed this transformation firsthand. We’ve seen how technology has democratized fitness, allowing us to reach and empower more people than ever before. With the integration of AI in fitness, your virtual coach can analyze your form, track your progress, and adapt your workouts in real-time, just like a human trainer would – sometimes even better! It’s an exciting time to be fit, and an even more exciting time to be fit from the comfort of your home. Want to dive deeper into how technology is shaping your sweat sessions?
Conclusion: Your Journey to Fitness Starts at Home 🏡💪

There you have it — 20 different types of exercises you can do at home to build strength, boost endurance, improve flexibility, and elevate your overall health. From the humble Glute Bridge to the gravity-defying Handstand Wall Walk, these movements prove that your home can be a fitness sanctuary without the need for expensive equipment or gym memberships.
Throughout this journey, we’ve unpacked the why, how, and what of each exercise, sharing expert tips, personal stories, and science-backed insights. Remember the key takeaways:
- Consistency beats intensity: Showing up regularly, even for short sessions, trumps sporadic marathon workouts.
- Form is your best friend: Proper technique prevents injury and maximizes results.
- Variety keeps you engaged: Mixing strength, cardio, balance, and flexibility exercises creates a balanced, enjoyable routine.
- Progressive overload applies at home: Challenge yourself by increasing reps, reducing rest, or trying harder variations.
- Mind and body are one: Fitness nurtures your mental well-being as much as your physical health.
If you ever wondered whether you could get a full-body workout without fancy gear or a gym, the answer is a resounding YES! And if you’re curious about how AI-powered virtual coaching can tailor these exercises to your unique needs, we invite you to explore our platform at Virtual Personal Trainer™ — your smart, supportive fitness companion.
So, what’s next? Pick a few exercises from this list, craft your routine (or use our suggested circuits), and get moving. Your body and mind will thank you. And remember, we’re here to help every step of the way!
Recommended Links for At-Home Fitness Enthusiasts 🛒
Ready to gear up? Here are some top-quality products and resources to enhance your home workouts:
-
Manduka PRO Yoga Mat:
Amazon | Manduka Official Website -
Liforme Original Yoga Mat:
Amazon | Liforme Official Website -
Gaiam Premium Yoga Mat:
Amazon | Gaiam Official Website -
TheraBand Resistance Bands Set:
Amazon | TheraBand Official Website -
Fit Simplify Resistance Loop Bands:
Amazon -
Serious Steel Fitness Resistance Bands:
Amazon | Serious Steel Official Website -
Recommended Books for At-Home Fitness:
Frequently Asked Questions About At-Home Exercises ❓
What are some tips for staying motivated and consistent with my at-home workouts?
Staying motivated at home can be challenging, but here are some expert tips:
- Schedule your workouts like appointments — block time on your calendar.
- Set realistic goals and track progress to celebrate small wins.
- Create a dedicated workout space to mentally prepare.
- Mix up your routine to avoid boredom.
- Use technology: Virtual trainers or apps can provide accountability.
- Find a workout buddy or join online communities for support.
- Reward yourself for milestones to build positive reinforcement.
Consistency is about building habits. Start small, be patient, and gradually increase intensity.
How can a virtual AI coach help me personalize my at-home exercise routine?
A virtual AI coach like Virtual Personal Trainer™ uses algorithms to:
- Assess your current fitness level and goals.
- Design customized workouts based on your preferences, limitations, and progress.
- Provide real-time feedback on form and technique via video analysis.
- Adapt workouts dynamically as you improve or face challenges.
- Offer motivation and reminders tailored to your schedule.
- Track your progress with data-driven insights.
This personalized approach maximizes efficiency and safety, making your at-home workouts smarter and more effective.
What are some fun and engaging at-home workout videos I can follow?
Here are some popular, highly-rated options:
-
Fitness Blender: Wide variety of free full-length workouts for all levels.
Fitness Blender YouTube -
POPSUGAR Fitness: Energetic, fun workouts with celebrity trainers.
POPSUGAR Fitness YouTube -
HASfit: Beginner to advanced workouts with clear instructions.
HASfit YouTube -
Virtual Personal Trainer™ YouTube Channel: Expert-led, AI-enhanced demonstrations and routines.
Virtual Personal Trainer™ YouTube -
Yoga with Adriene: Accessible, calming yoga sessions for all levels.
Yoga with Adriene YouTube
How can I modify exercises to make them easier or harder at home?
Modifications depend on the exercise but here are general strategies:
-
To make easier:
- Reduce range of motion.
- Use support (e.g., chair for squats).
- Slow down the tempo.
- Decrease reps or sets.
- Perform partial movements (e.g., knee push-ups instead of full push-ups).
-
To make harder:
- Increase reps or sets.
- Add resistance (bands, household items).
- Slow down eccentric (lowering) phase.
- Add plyometric elements (jump squats, burpees).
- Perform unilateral (single-limb) variations like pistol squats.
Always prioritize form and avoid pushing into pain.
Are there any low-impact exercises I can do at home that are gentle on my joints?
Absolutely! Low-impact exercises reduce joint stress while still providing benefits:
- Marching in place
- Glute bridges
- Chair squats
- Side planks
- Yoga poses like Child’s Pose and Downward Dog
- Swimming or water aerobics (if you have access)
- Resistance band exercises
These are great for beginners, seniors, or those recovering from injury.
What are some effective cardio exercises I can do at home to burn calories?
Effective at-home cardio includes:
- Jumping jacks (or low-impact step jacks)
- High knees
- Butt kicks
- Mountain climbers
- Burpees (modified if needed)
- Imaginary jump rope
- Squat jumps
- Alternating lunges with pace
Circuit training combining these moves maximizes calorie burn.
How can I create a full-body workout routine without equipment at home?
A balanced full-body routine should target:
- Lower body: Squats, lunges, glute bridges
- Upper body pushing: Push-ups (knee or full)
- Upper body pulling: Inverted rows under a sturdy table or towel rows
- Core: Planks, hollow holds, side planks
- Cardio: Mountain climbers, jumping jacks
Structure as circuits or supersets with 2-4 rounds, resting 30-60 seconds between rounds. Adjust reps and intensity based on your level.
What are the best bodyweight exercises I can do at home?
Some of the most effective bodyweight exercises include:
- Squats (chair or bodyweight)
- Push-ups (wall, knee, full)
- Lunges (forward, reverse)
- Glute bridges
- Planks (front and side)
- Mountain climbers
- Burpees
- Hollow hold to jackknife
These cover strength, endurance, and core stability.
What are the 4 common types of exercise?
The four main types are:
- Strength Training: Builds muscle and bone density (e.g., squats, push-ups).
- Cardiovascular (Aerobic) Exercise: Improves heart and lung health (e.g., jumping jacks, running).
- Flexibility Exercises: Enhance range of motion (e.g., yoga, stretching).
- Balance Exercises: Improve stability and coordination (e.g., single-leg stand, side plank).
A well-rounded fitness program incorporates all four.
What are some indoor exercises?
Indoor exercises include:
- Bodyweight strength moves (push-ups, squats)
- Yoga and Pilates
- Jump rope or imaginary jump rope
- Dance workouts
- Resistance band training
- Core exercises (planks, crunches)
- Low-impact cardio (marching in place, step touches)
What kind of exercises can you do at home?
At home, you can do:
- Bodyweight strength training
- Cardio circuits
- Yoga and stretching
- Balance and mobility drills
- Resistance band workouts
- Functional movements (lunges, step-ups on stairs)
Reference Links and Further Reading 📚
- CDC Physical Activity Guidelines for Adults
- Healthline: At-Home Workouts Guide
- Leaps and Rebounds: 20 Different Types of Exercises You Can Do At-Home
- Nerd Fitness: Beginner Bodyweight Workout
- Harvard Health: What to Do When You’re Feeling Down
- Manduka Yoga Mats
- TheraBand Resistance Bands
- Virtual Personal Trainer™ YouTube Channel
Ready to take your at-home fitness to the next level? Dive into our Home-based Workouts and Exercise Demonstrations for expert-led routines and tutorials. Here’s to your health and happiness — right from your own home! 🎉